> ## Documentation Index
> Fetch the complete documentation index at: https://omer-914cc1c6.mintlify.site/llms.txt
> Use this file to discover all available pages before exploring further.

# 快速上手

> 几分钟内部署你的文档

本快速上手指南将演示如何在几分钟内设置并部署你的文档站点。

完成本指南后，你将拥有一个已上线的文档站点，可随时进行自定义与扩展。

<Info>
  **先决条件**：开始前，请先[创建账户](https://mintlify.com/start)并完成引导设置。
</Info>

<div id="getting-started">
  ## 入门
</div>

完成初始设置后，你的文档站点会自动部署到一个唯一的 URL，格式如下：

```
https://<your-project-name>.mintlify.app
```

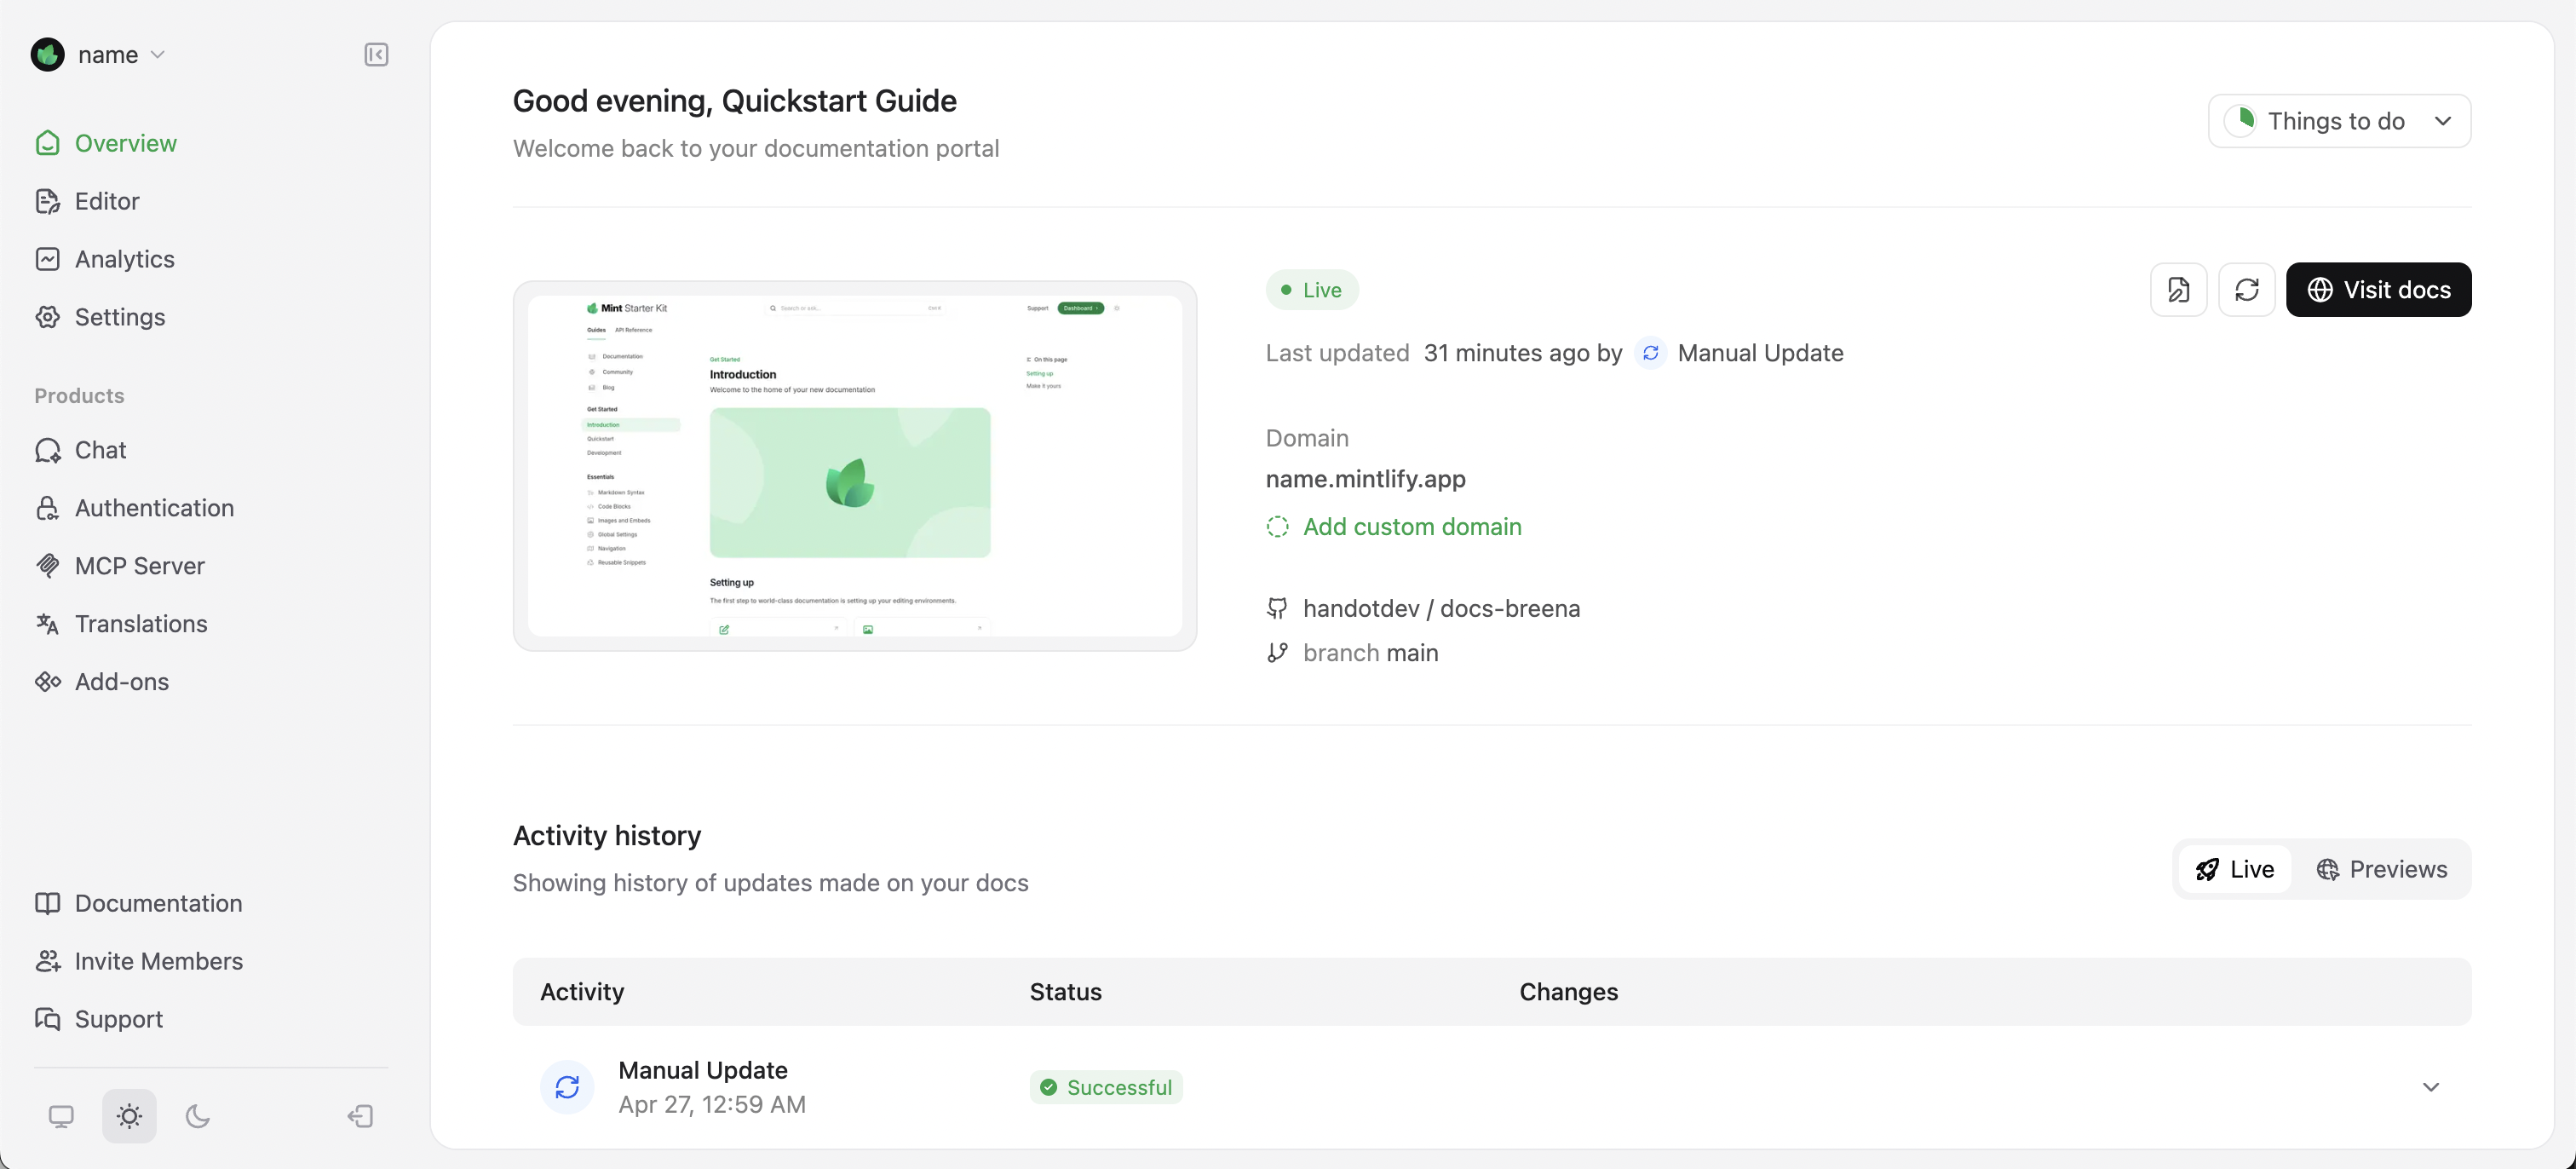
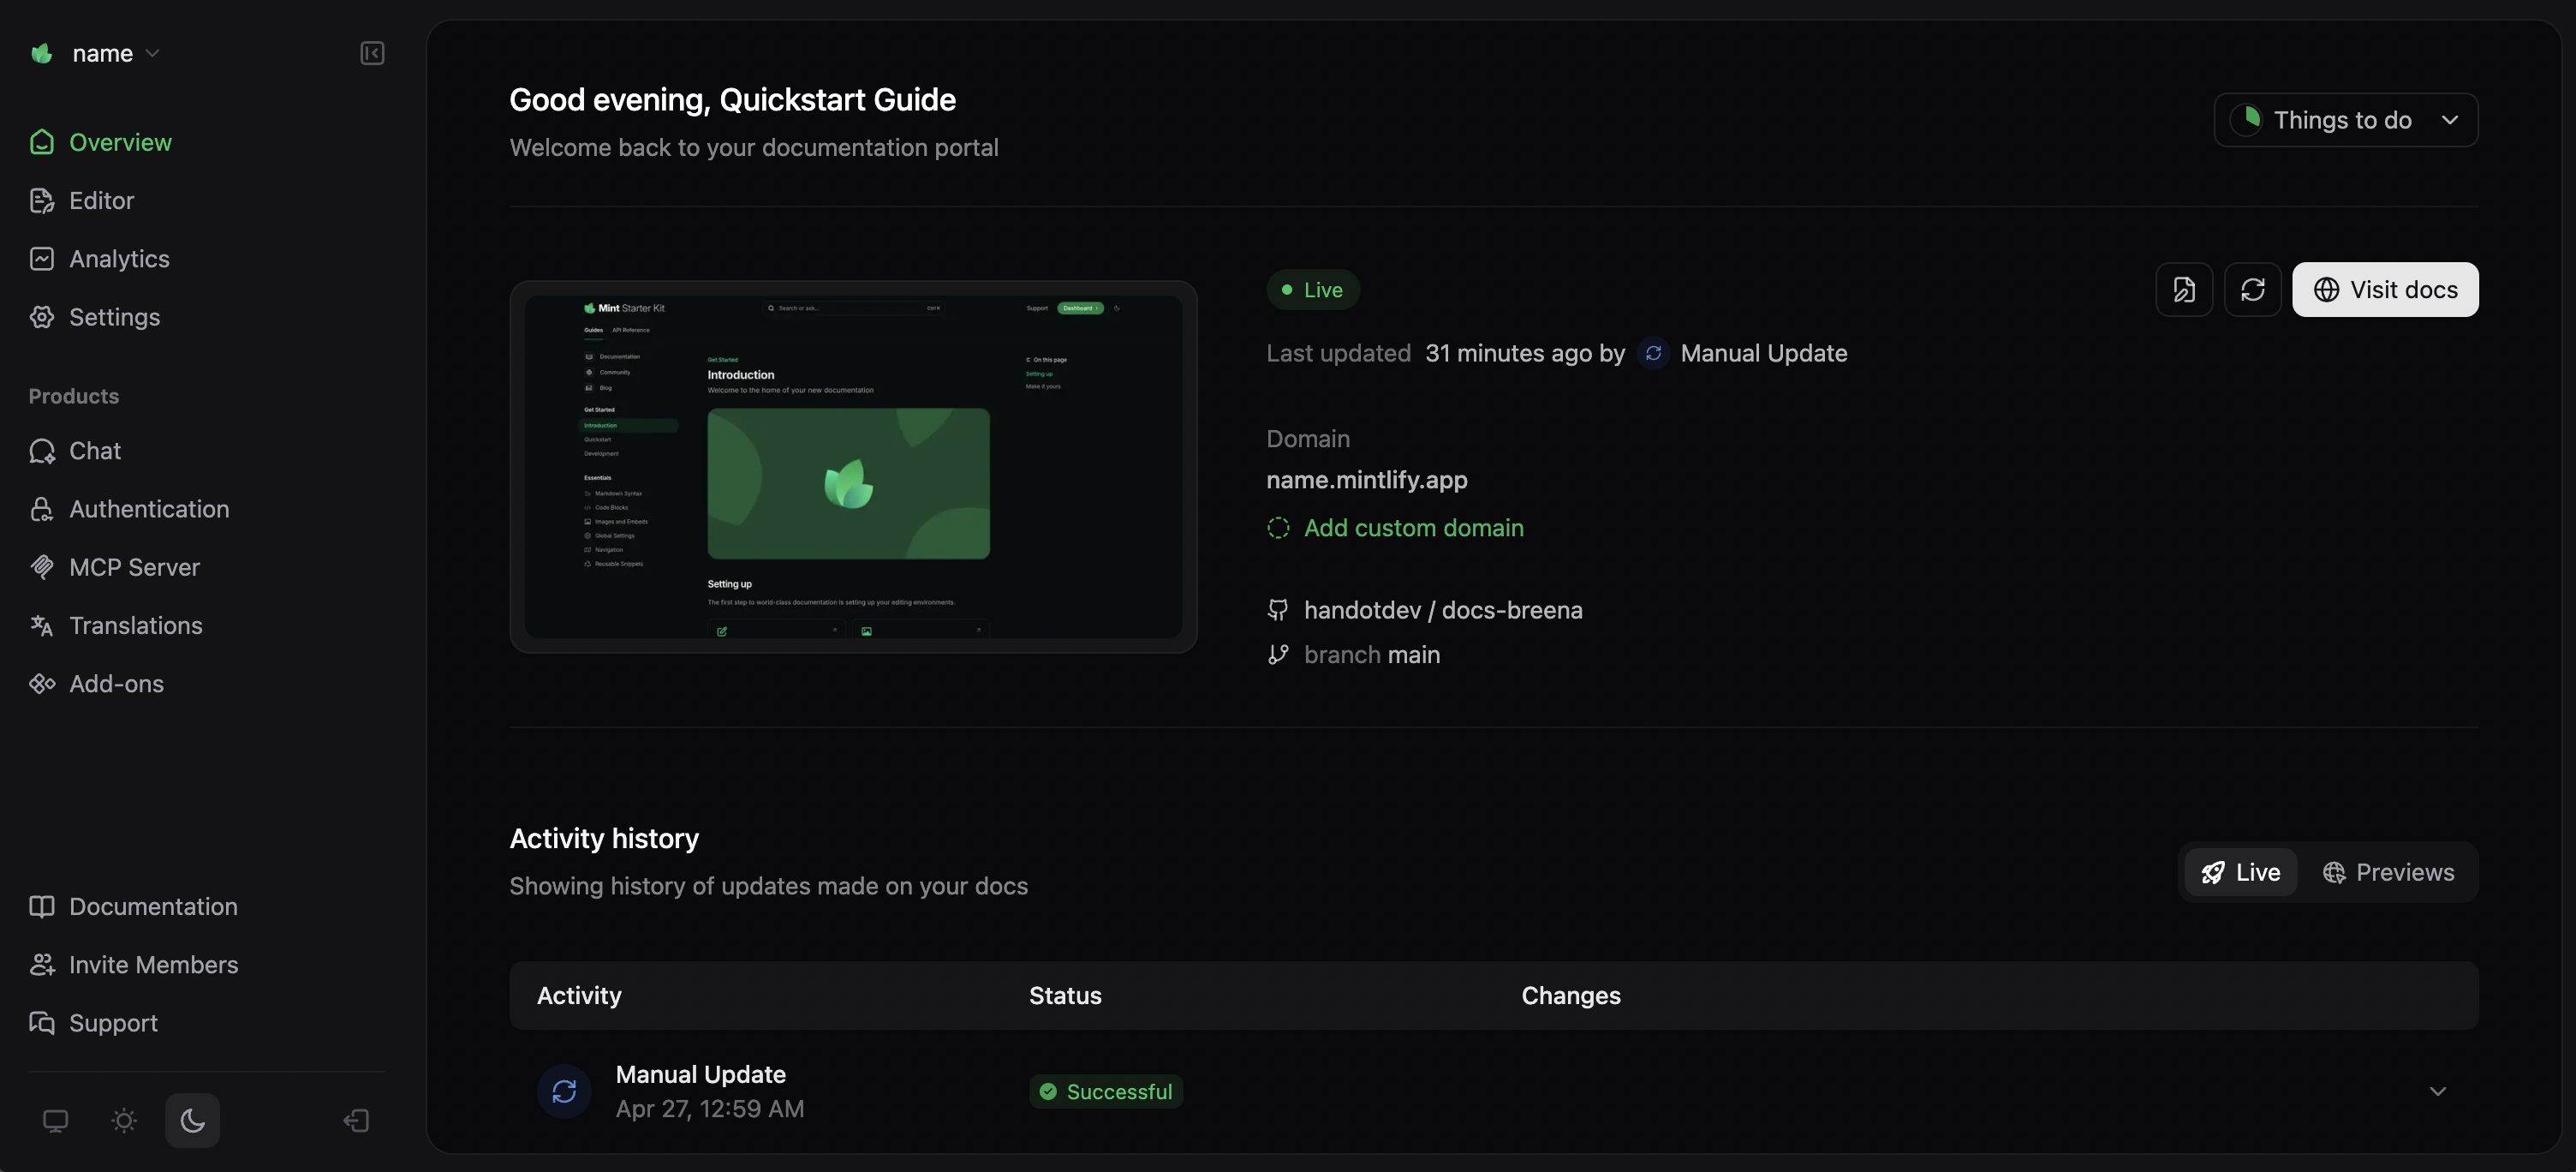
在你的[控制台](https://dashboard.mintlify.com/)的 Overview 页面找到你的 URL。

<Frame>
  <img src="https://mintcdn.com/omer-914cc1c6/zyJsbuZtXQKHf9Ui/images/quickstart/mintlify-domain-light.png?fit=max&auto=format&n=zyJsbuZtXQKHf9Ui&q=85&s=2996fe7332cfbab264eaf86de78224d3" alt="Mintlify 域名" className="block dark:hidden" width="3024" height="1372" data-path="images/quickstart/mintlify-domain-light.png" />

  <img src="https://mintcdn.com/omer-914cc1c6/zyJsbuZtXQKHf9Ui/images/quickstart/mintlify-domain-dark.png?fit=max&auto=format&n=zyJsbuZtXQKHf9Ui&q=85&s=8b40e210b3a239e2d7005b2ebd7d3afa" alt="Mintlify 域名" className="hidden dark:block" width="3008" height="1368" data-path="images/quickstart/mintlify-domain-dark.png" />
</Frame>

你的网站 URL 会立即生效。在设置文档站点期间，请使用该 URL 进行测试并与团队分享。

<div id="install-the-github-app">
  ### 安装 GitHub 应用
</div>

Mintlify 提供了一个 GitHub 应用，可在你将更改推送到存储库时自动触发部署。

按照入门检查清单或在控制台中的指引安装 GitHub 应用。

1. 在 Mintlify 控制台中进入 **Settings**。
2. 在侧边栏选择 **GitHub App**。
3. 选择 **Install GitHub App**。这将在新标签页中打开 GitHub 应用安装页面。
4. 选择要安装该应用的组织或用户账户。
5. 选择你要连接的存储库。
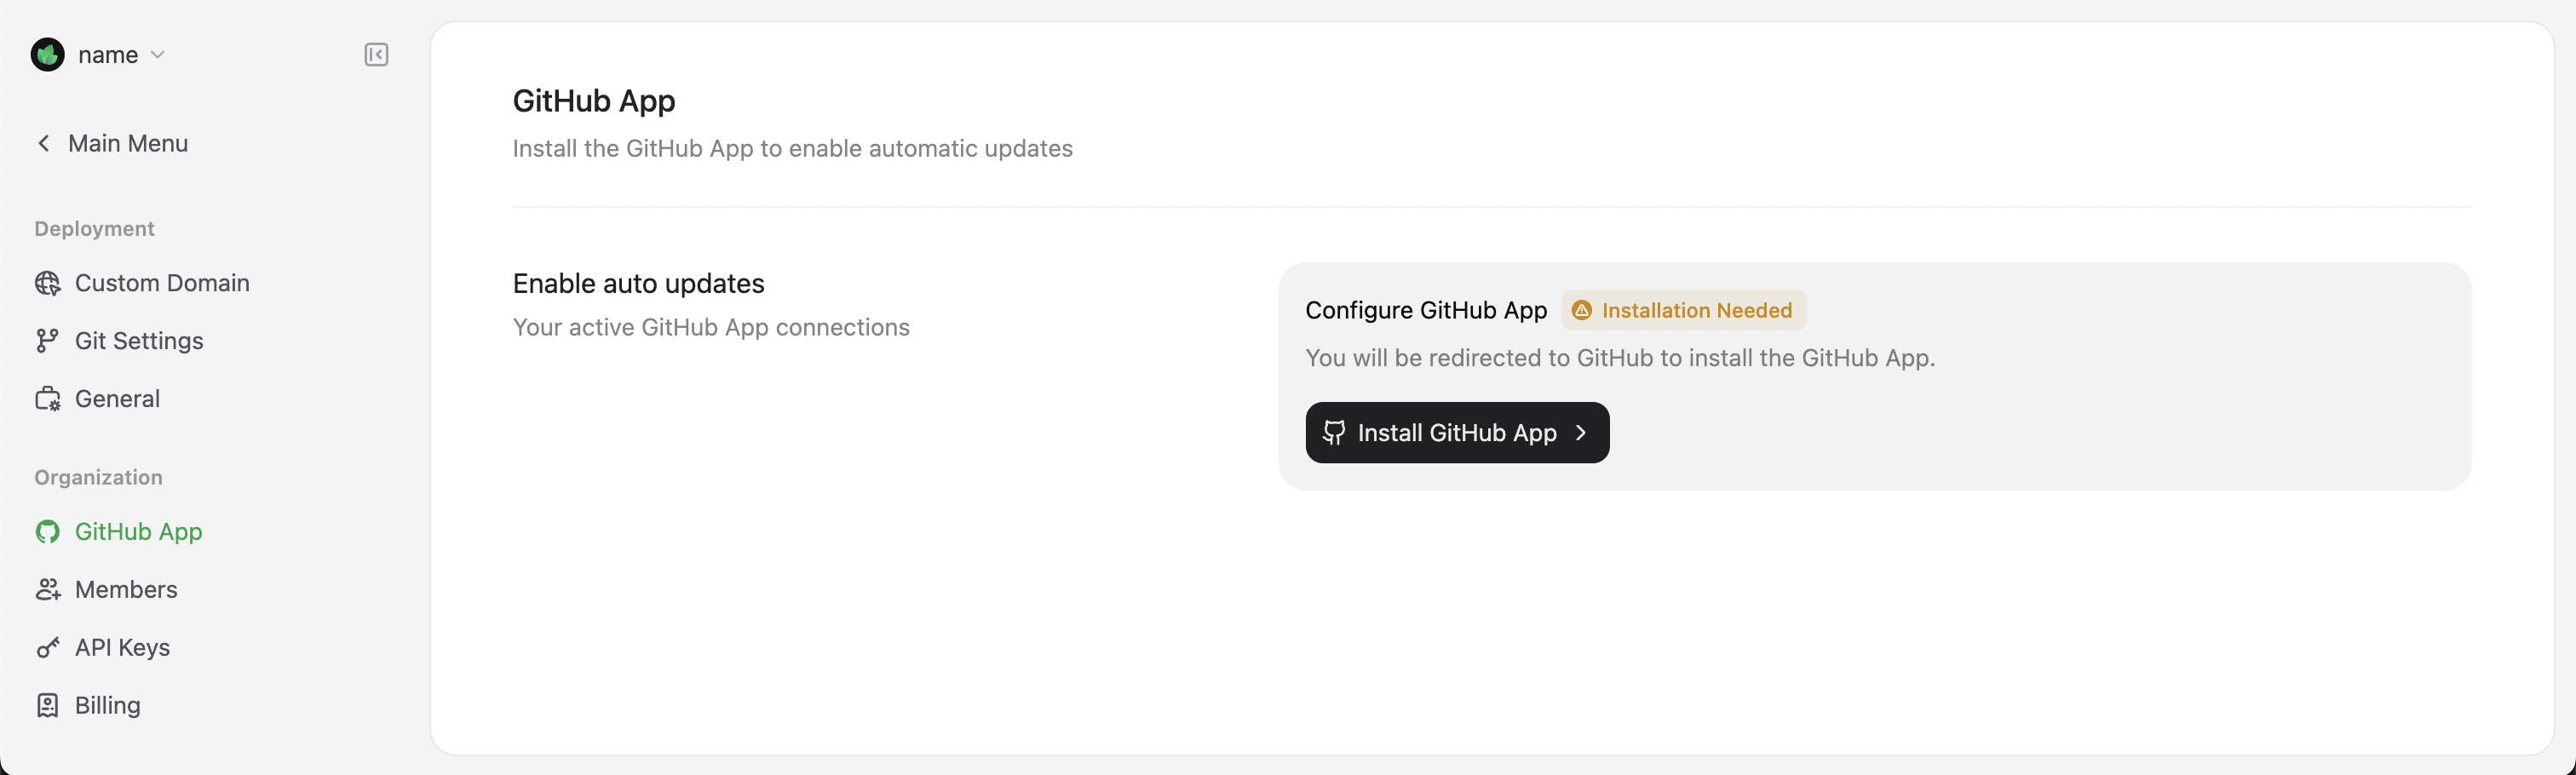
<Frame>
  <img src="https://mintcdn.com/omer-914cc1c6/zyJsbuZtXQKHf9Ui/images/quickstart/github-app-installation-light.png?fit=max&auto=format&n=zyJsbuZtXQKHf9Ui&q=85&s=0a3f2a8882cb6716c622302ab5963a92" alt="GitHub App Installation" className="block dark:hidden" width="3024" height="910" data-path="images/quickstart/github-app-installation-light.png" />

  <img src="https://mintcdn.com/omer-914cc1c6/zyJsbuZtXQKHf9Ui/images/quickstart/github-app-installation-dark.png?fit=max&auto=format&n=zyJsbuZtXQKHf9Ui&q=85&s=94c62cea749e8ed4f5fd56897956d81a" alt="GitHub App Installation" className="hidden dark:block" width="3016" height="906" data-path="images/quickstart/github-app-installation-dark.png" />
</Frame>

<Info>
  如果你将文档迁移到其他存储库，请更新 GitHub 应用的权限。
</Info>

<div id="authorize-your-github-account">
  ### 授权你的 GitHub 账户
</div>

1. 在 Mintlify 控制台前往 **Settings**。
2. 在侧边栏选择 **My Profile**。
3. 选择 **Authorize GitHub account**。会在新标签页中打开 GitHub 授权页面。

<Info>
  根据你组织的设置，你的 GitHub 组织管理员可能需要为你的账户进行授权。
</Info>

<div id="editing-workflows">
  ## 编辑工作流程
</div>

Mintlify 提供两种用于创建和维护文档的工作流程：

<Card title="基于代码的工作流程" icon="terminal" horizontal href="#code-based-workflow">
  适合在本地环境中配合现有工具工作的用户。点击跳转到该章节。
</Card>

<Card title="网页编辑器工作流程" icon="mouse-pointer-2" horizontal href="#web-editor-workflow">
  适合在网页浏览器中使用可视化界面的用户。点击跳转到该章节。
</Card>

<div id="code-based-workflow">
  ## 基于代码的工作流
</div>

基于代码的工作流可与您现有的开发环境和 Git 仓库集成。该工作流最适合希望将文档与代码并行管理的技术团队。

<div id="install-the-cli">
  ### 安装命令行界面（CLI）
</div>

要在本地处理文档，请在终端运行以下命令，安装名为 [mint](https://www.npmjs.com/package/mint) 的命令行界面（CLI）：

<CodeGroup>
  ```bash npm theme={null}
  npm i -g mint
  ```

  ```bash pnpm theme={null}
  pnpm add -g mint
  ```
</CodeGroup>

<Info>
  需要在本机已安装 Node.js。若遇到安装问题，请查看故障排查指南。
</Info>

<div id="edit-the-documentation">
  ### 编辑文档
</div>

完成环境配置后，您即可开始编辑文档文件。例如，更新介绍页的标题：

1. 打开您在入门引导过程中创建的存储库。
2. 打开 `index.mdx`，定位到文件顶部：

```mdx index.mdx theme={null}
---
title: "介绍"
description: "这是文档的介绍"
---
```

3. 将 `title` 字段更新为 `"Hello World"`。

```mdx index.mdx {2} theme={null}
---
title: "你好世界"
description: "这是文档的介绍"
---
```

<div id="preview-the-changes">
  ### 预览更改
</div>

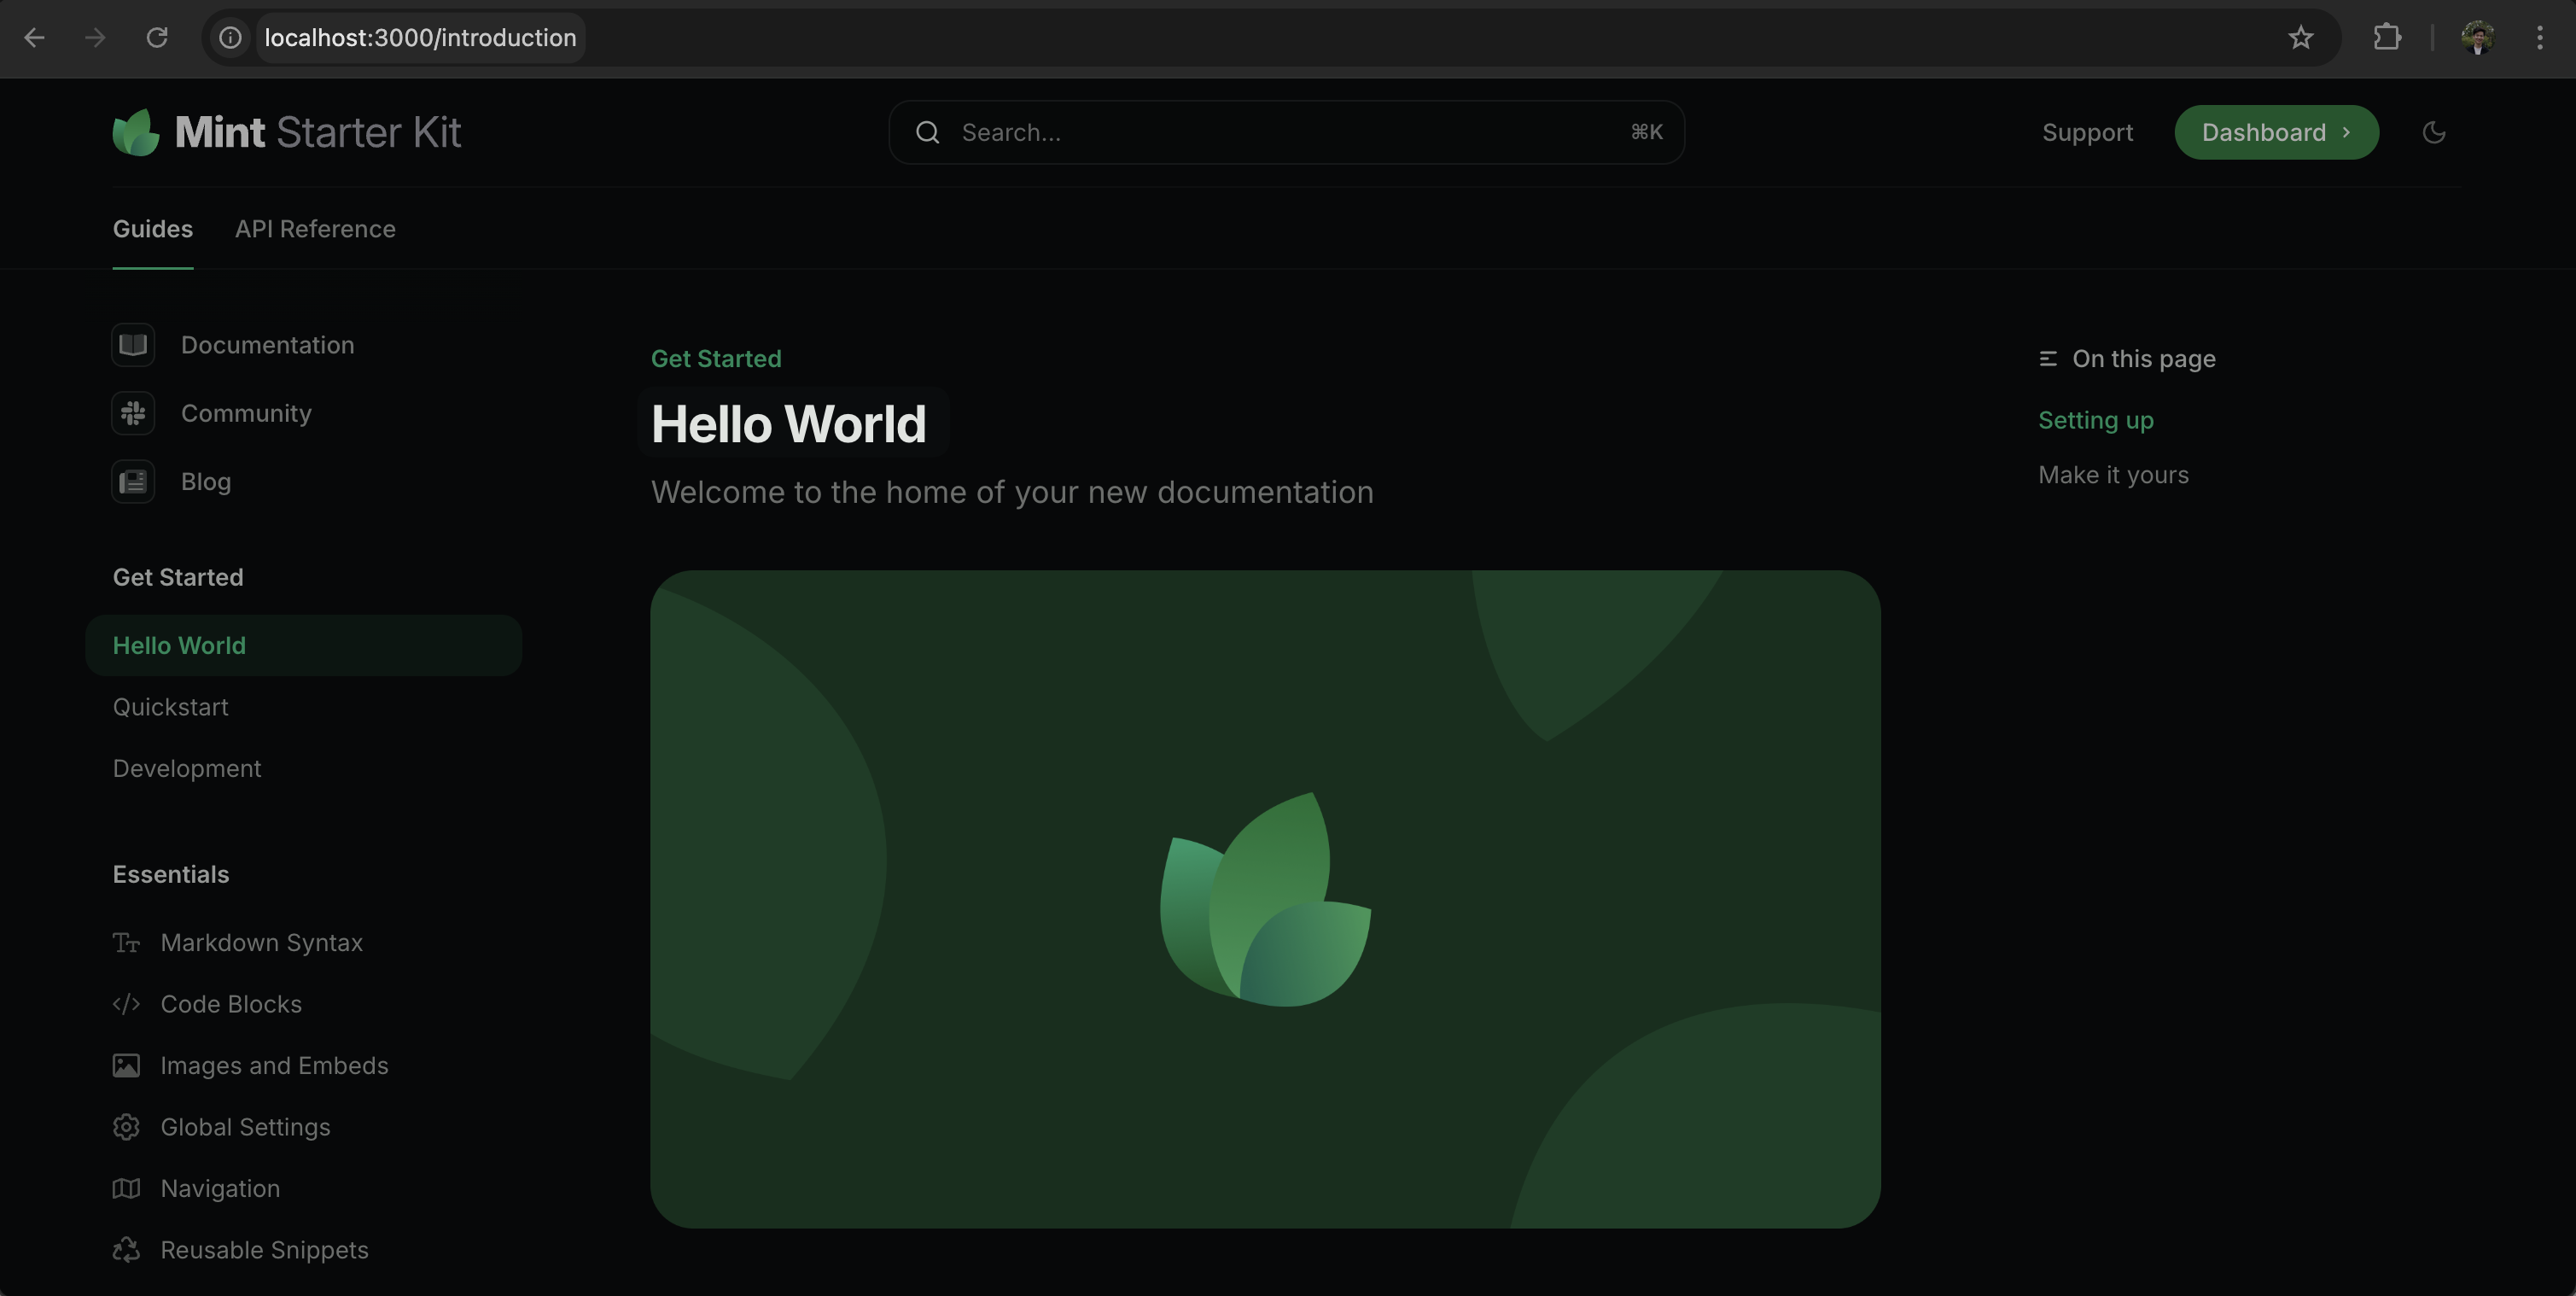
要在本地预览更改，请运行以下命令：

```bash theme={null}
mint dev
```

你的预览将可在 `localhost:3000` 查看。
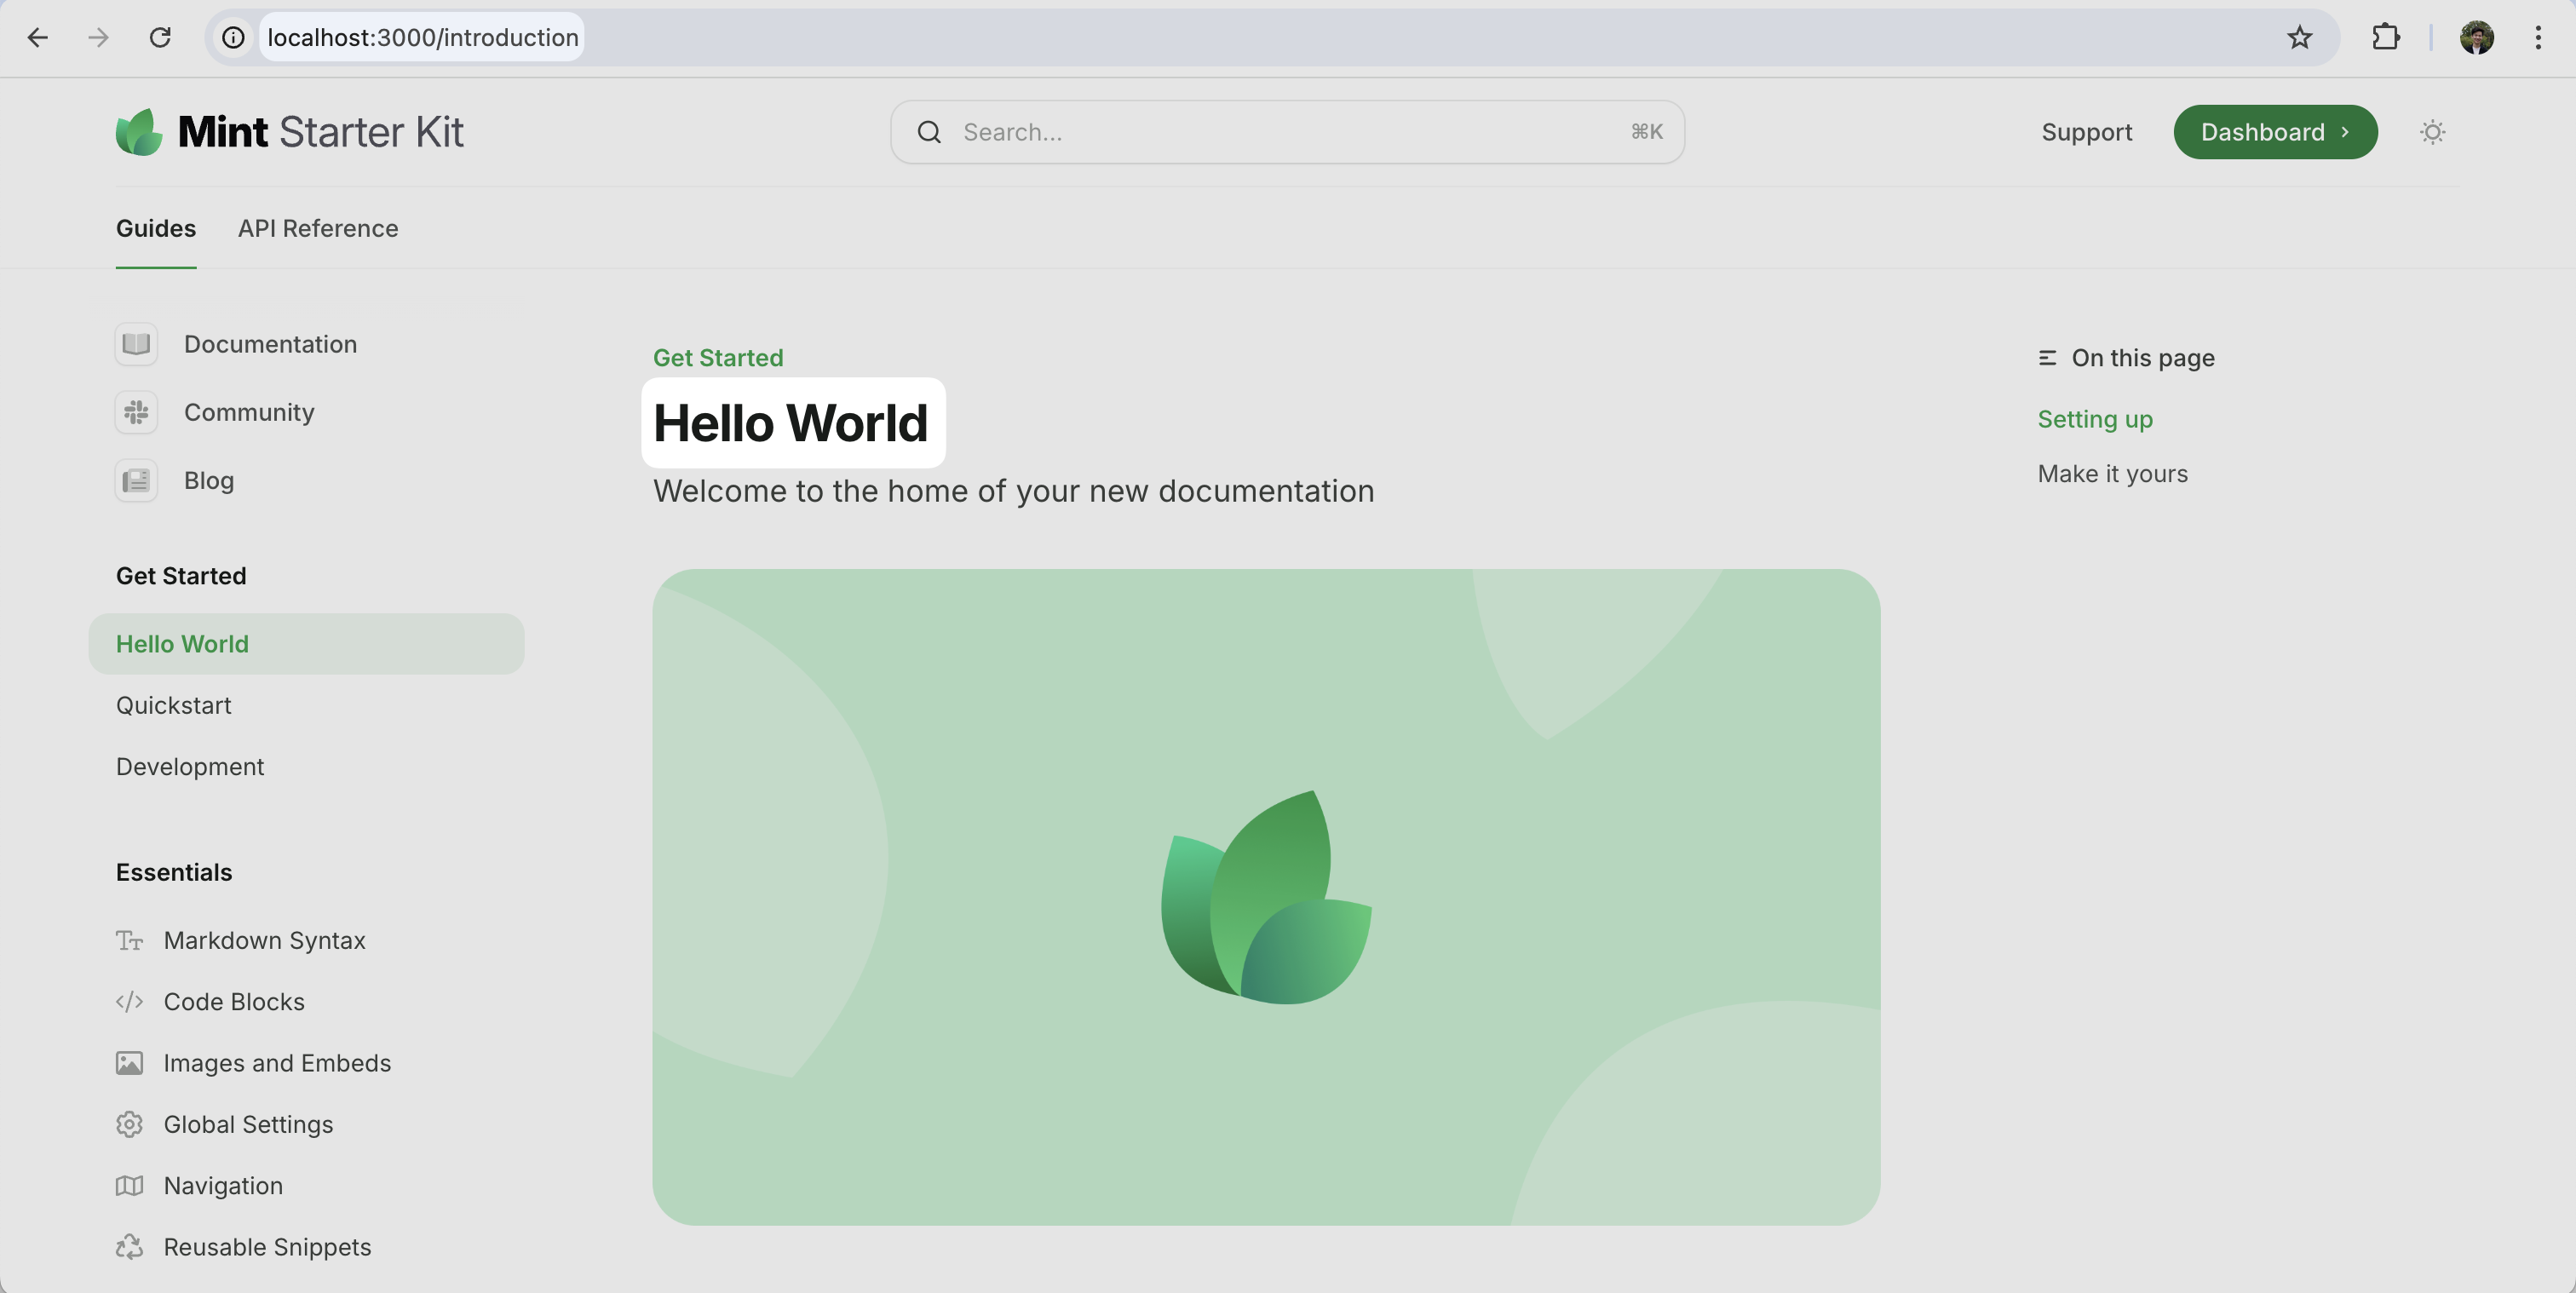
<Frame>
  <img src="https://mintcdn.com/omer-914cc1c6/zyJsbuZtXQKHf9Ui/images/quickstart/mintlify-dev-light.png?fit=max&auto=format&n=zyJsbuZtXQKHf9Ui&q=85&s=a24b188b587e0b27b68b86123411f07a" alt="Mintlify Dev" className="block dark:hidden" width="3024" height="1518" data-path="images/quickstart/mintlify-dev-light.png" />

  <img src="https://mintcdn.com/omer-914cc1c6/zyJsbuZtXQKHf9Ui/images/quickstart/mintlify-dev-dark.png?fit=max&auto=format&n=zyJsbuZtXQKHf9Ui&q=85&s=ba367443a9ede91d6b79fc83dcd00af3" alt="Mintlify Dev" className="hidden dark:block" width="3018" height="1518" data-path="images/quickstart/mintlify-dev-dark.png" />
</Frame>

<div id="push-the-changes">
  ### 推送更改
</div>

当你准备发布更改时，将其推送到你的存储库。

Mintlify 会自动检测更改，构建你的文档，并将更新部署到你的网站。你可以在 GitHub 存储库的提交历史或 [控制台](https://dashboard.mintlify.com) 中查看部署状态。

部署完成后，你的最新更新将可通过 `<your-project-name>.mintlify.app` 访问。

<Card title="跳转到添加自定义域名" icon="arrow-down" href="#adding-a-custom-domain" horizontal>
  你也可以跳过网页编辑器流程，直接前往添加自定义域名。
</Card>

<div id="web-editor-workflow">
  ## Web editor 工作流
</div>

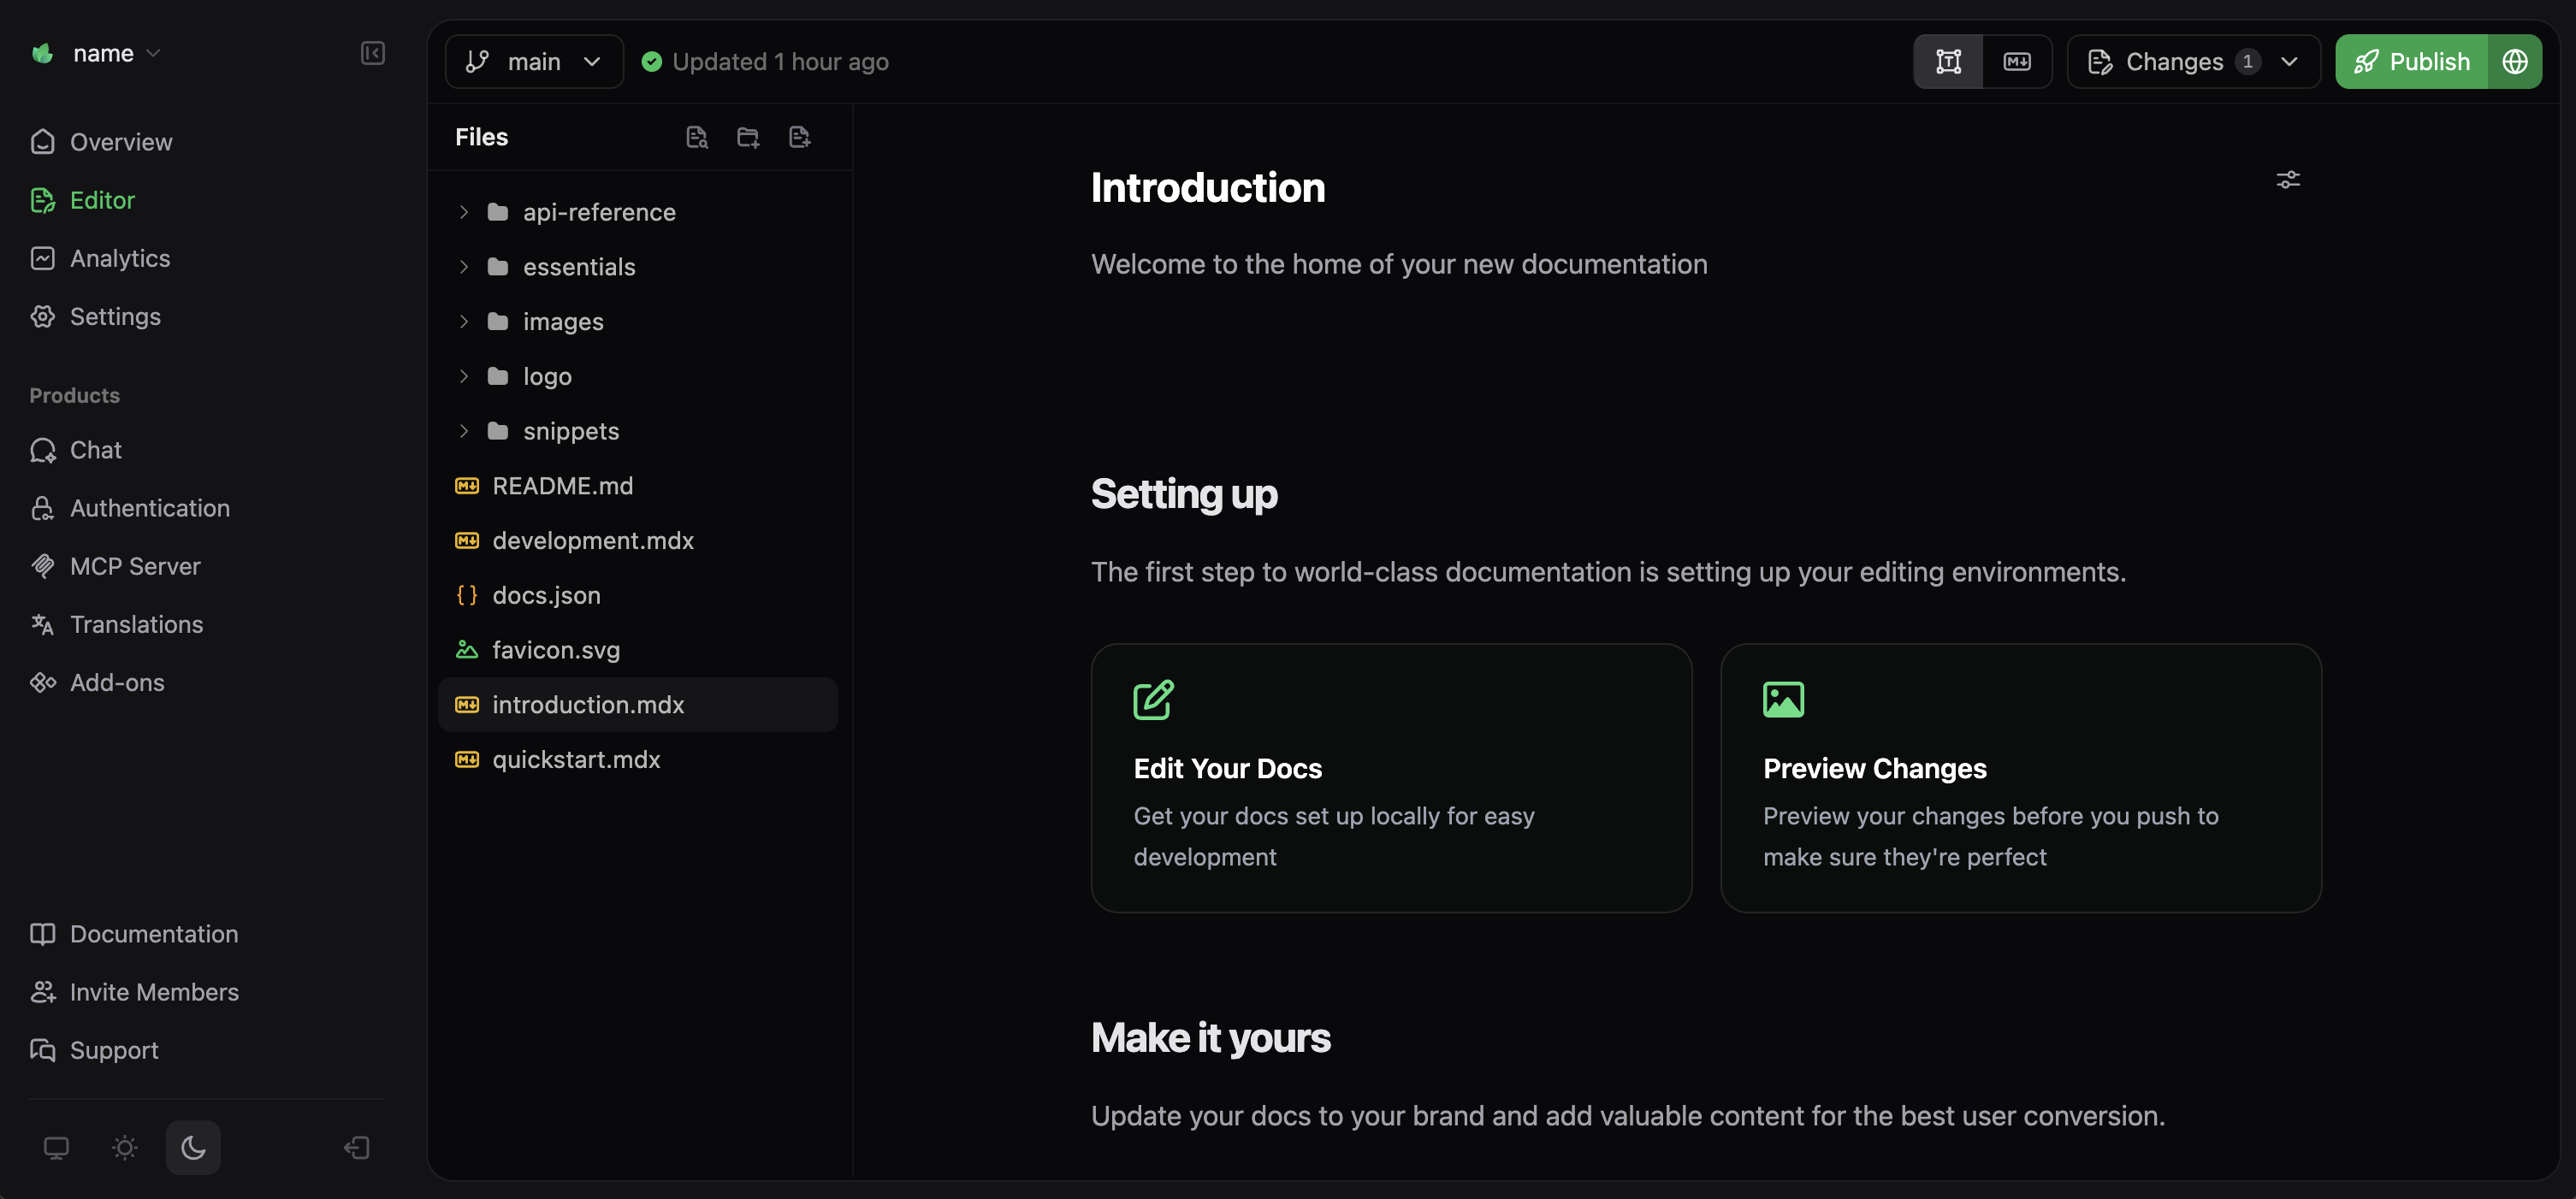
Web editor 工作流提供 WYSIWYG（所见即所得）界面，用于创建和编辑文档。该工作流最适合希望直接在网页浏览器中工作且无需额外本地开发工具的用户。

<div id="access-the-web-editor">
  ### 访问网页编辑器
</div>

1. 登录你的[控制台](https://dashboard.mintlify.com)。
2. 在左侧边栏选择 **Editor**。
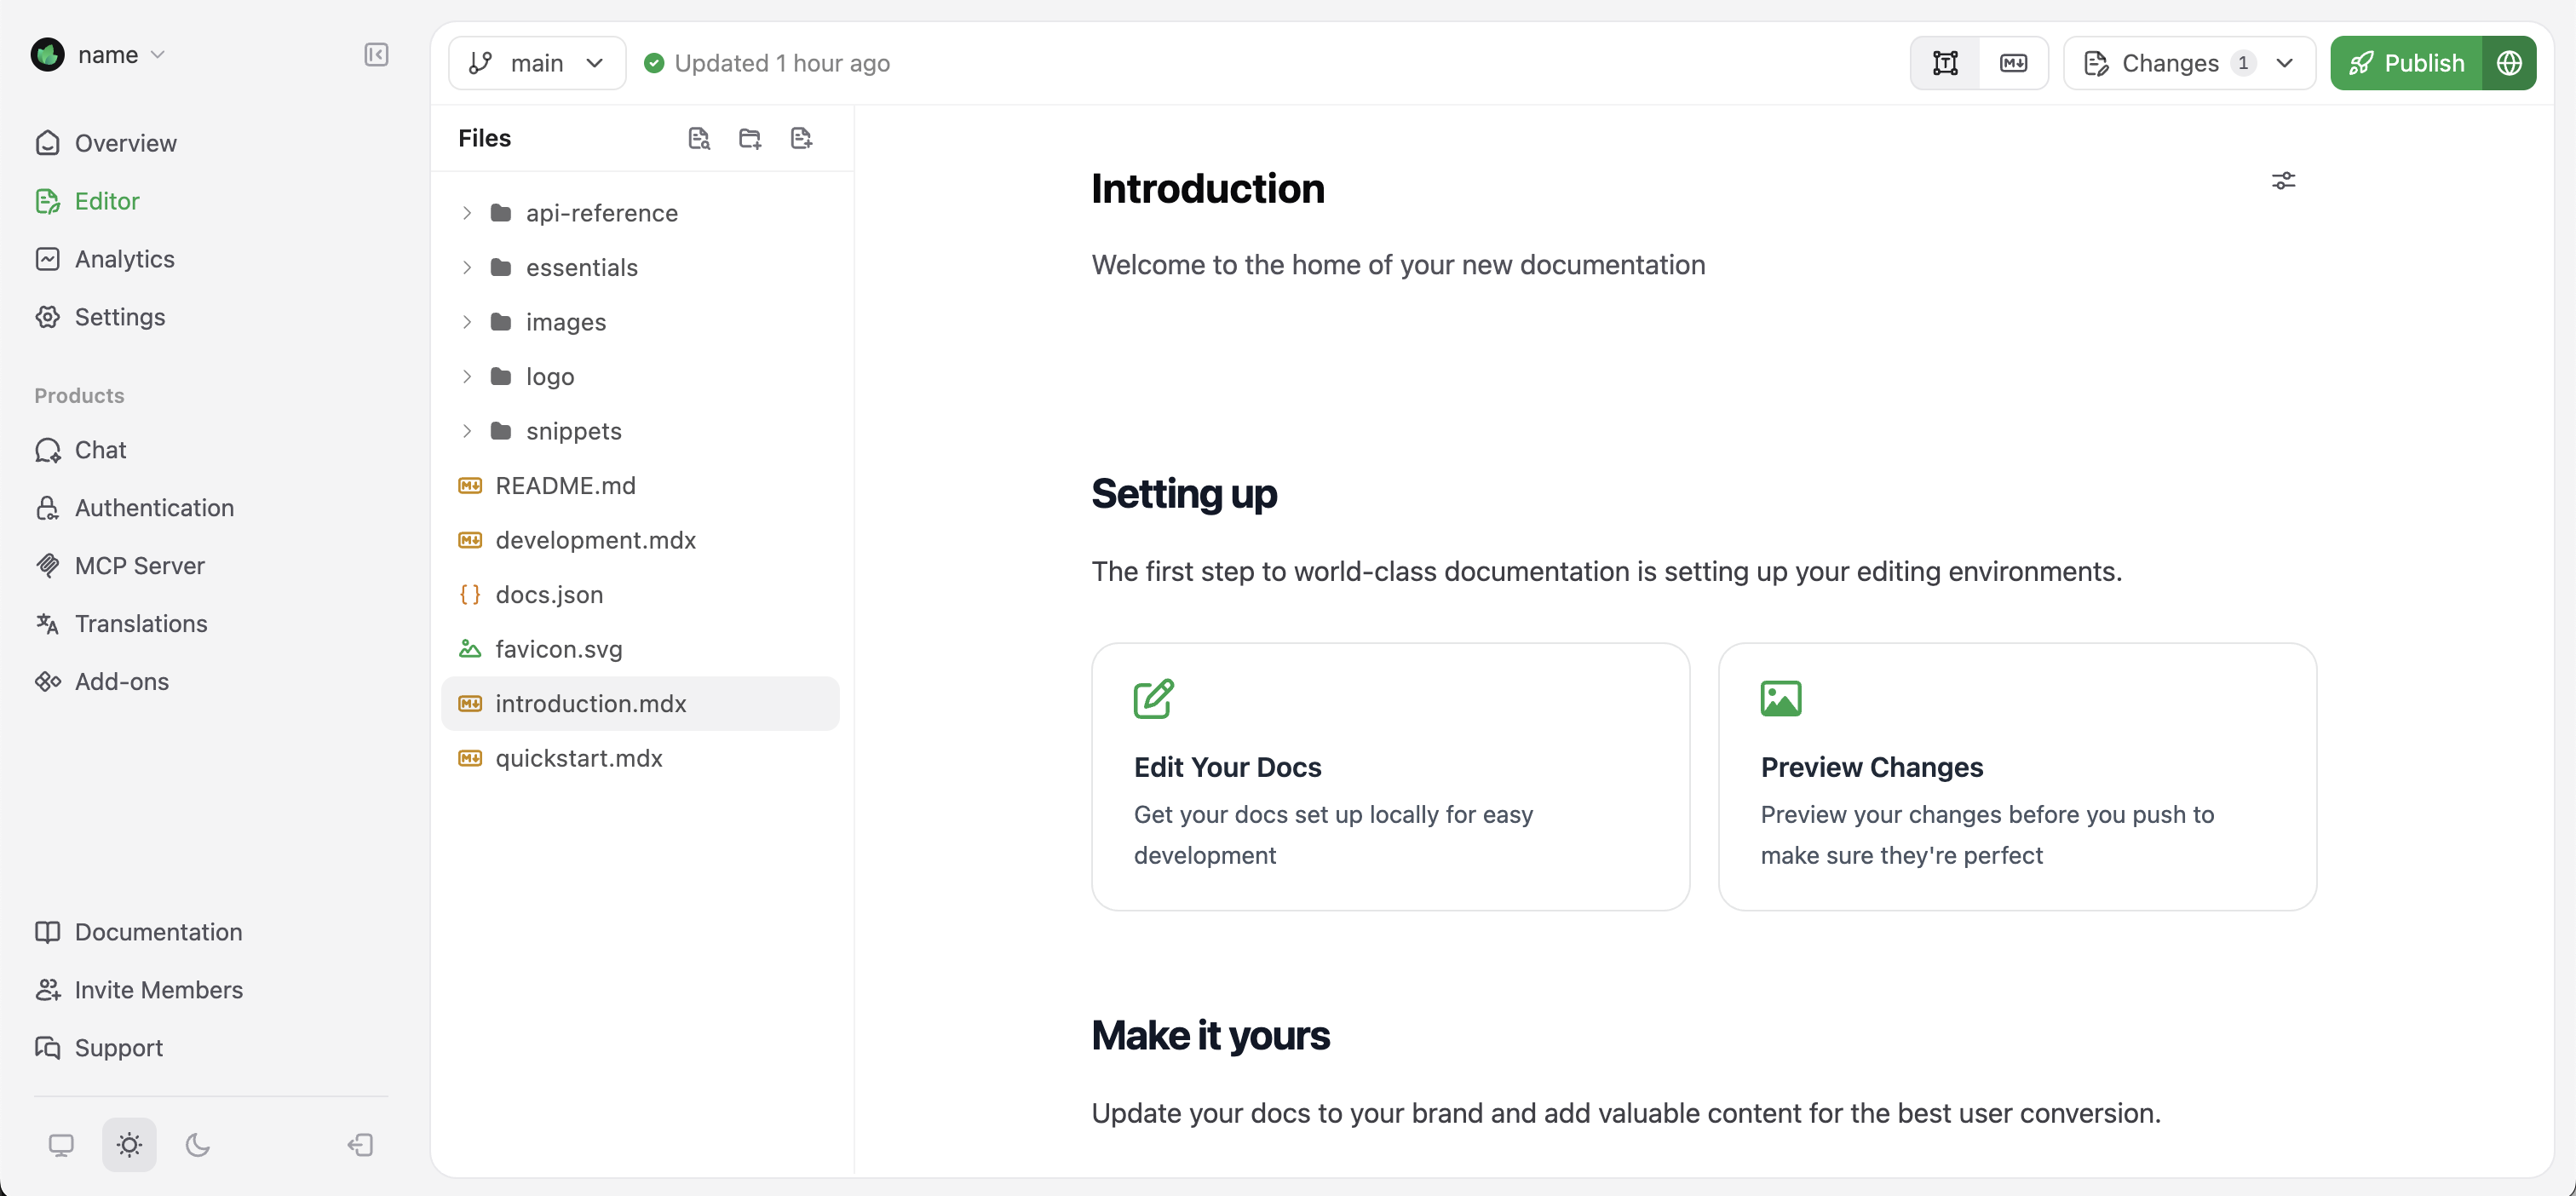
<Info>
  如果你尚未安装 GitHub 应用，打开网页编辑器时会提示你进行安装。
</Info>

<Frame>
  <img alt="Mintlify 网页编辑器的可视化编辑模式" src="https://mintcdn.com/omer-914cc1c6/zyJsbuZtXQKHf9Ui/images/quickstart/web-editor-light.png?fit=max&auto=format&n=zyJsbuZtXQKHf9Ui&q=85&s=1cf68220e551f01f2449490d20f5fe66" className="block dark:hidden" width="3024" height="1404" data-path="images/quickstart/web-editor-light.png" />

  <img alt="Mintlify 网页编辑器的可视化编辑模式" src="https://mintcdn.com/omer-914cc1c6/zyJsbuZtXQKHf9Ui/images/quickstart/web-editor-dark.png?fit=max&auto=format&n=zyJsbuZtXQKHf9Ui&q=85&s=b4fbc6d934f99186e54d005e921b9a2b" className="hidden dark:block" width="3011" height="1402" data-path="images/quickstart/web-editor-dark.png" />
</Frame>

<div id="edit-the-documentation">
  ### 编辑文档
</div>

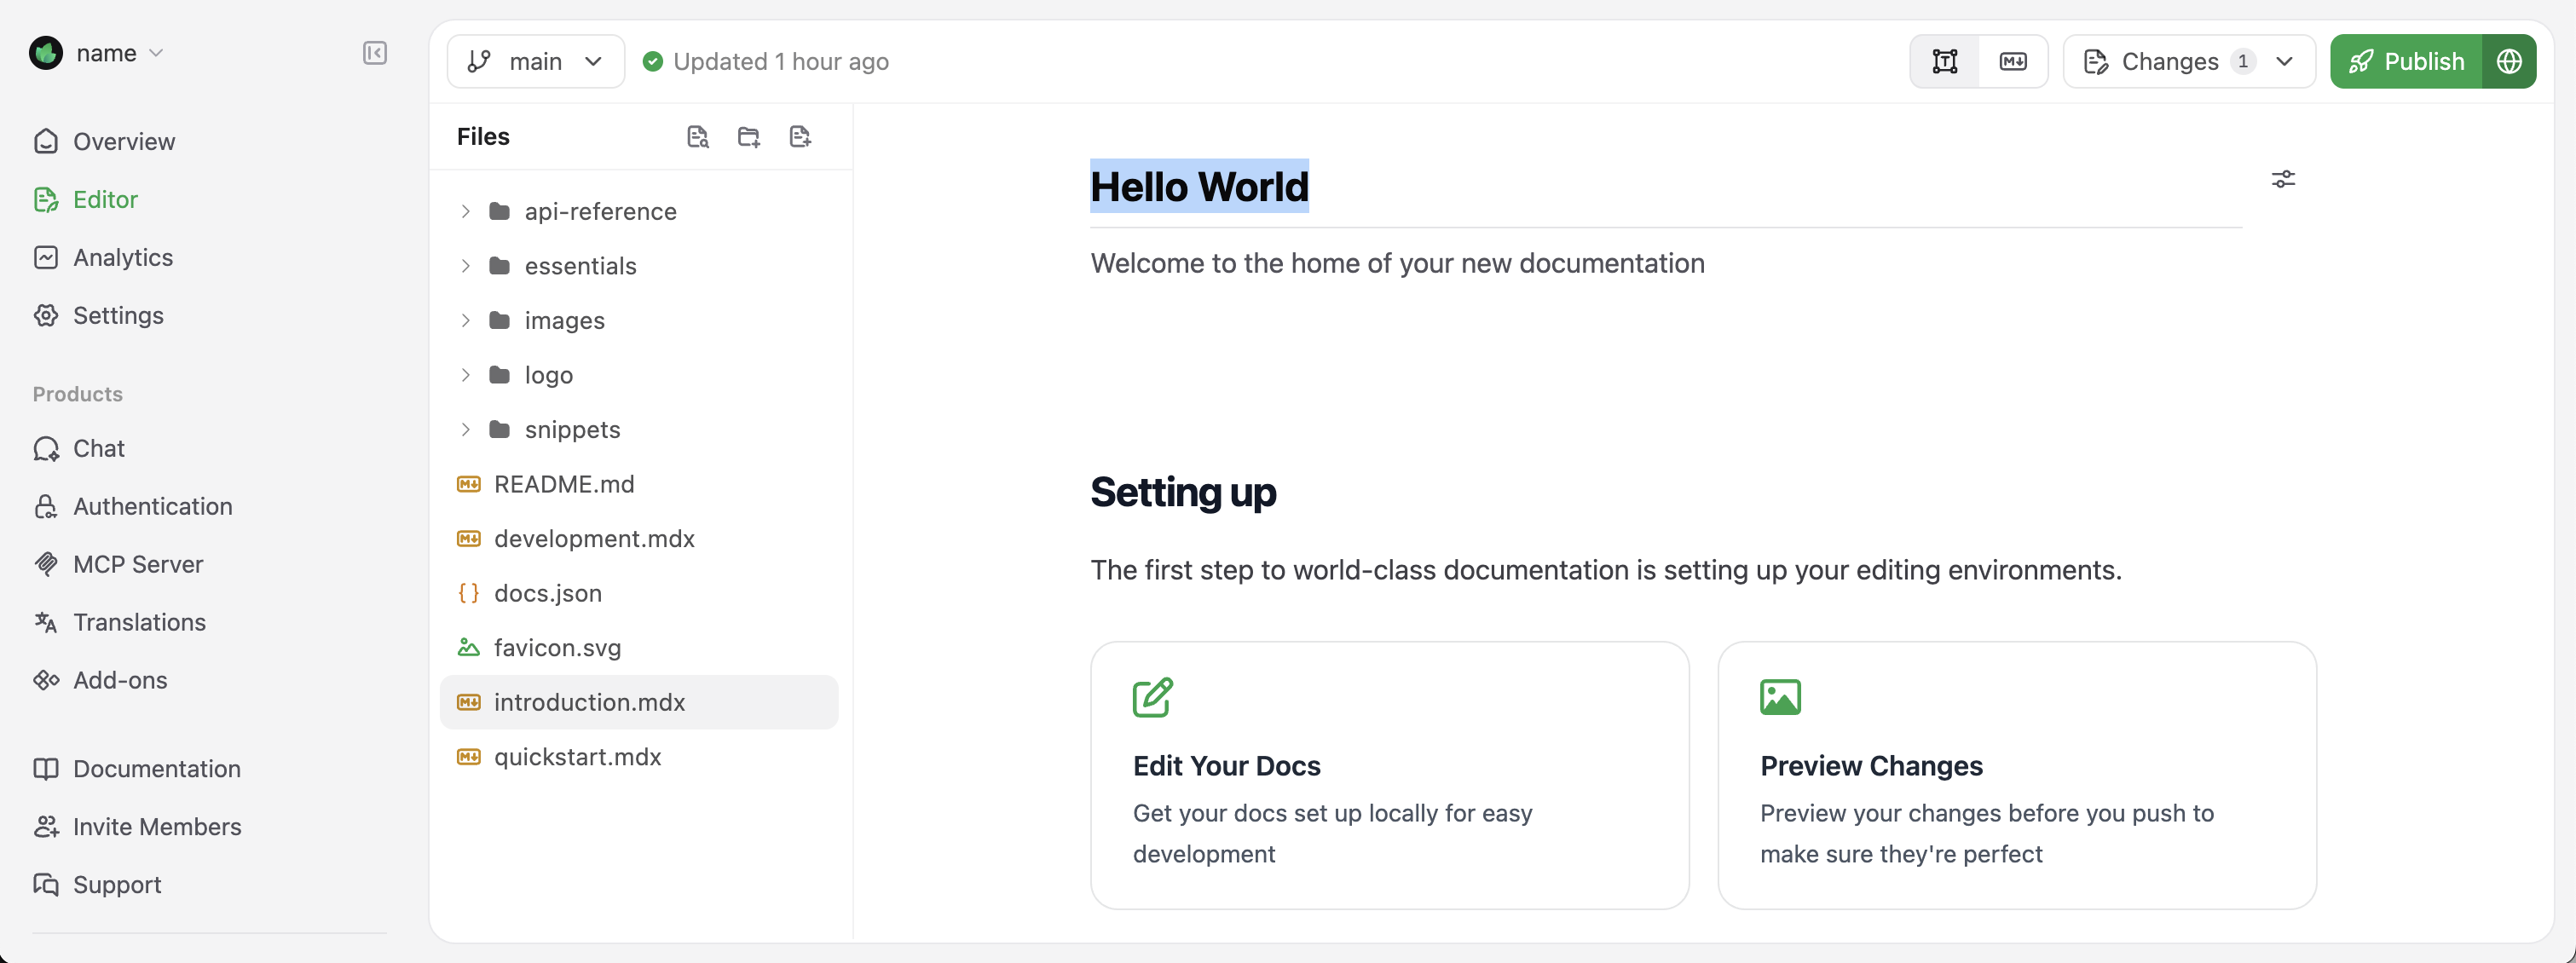
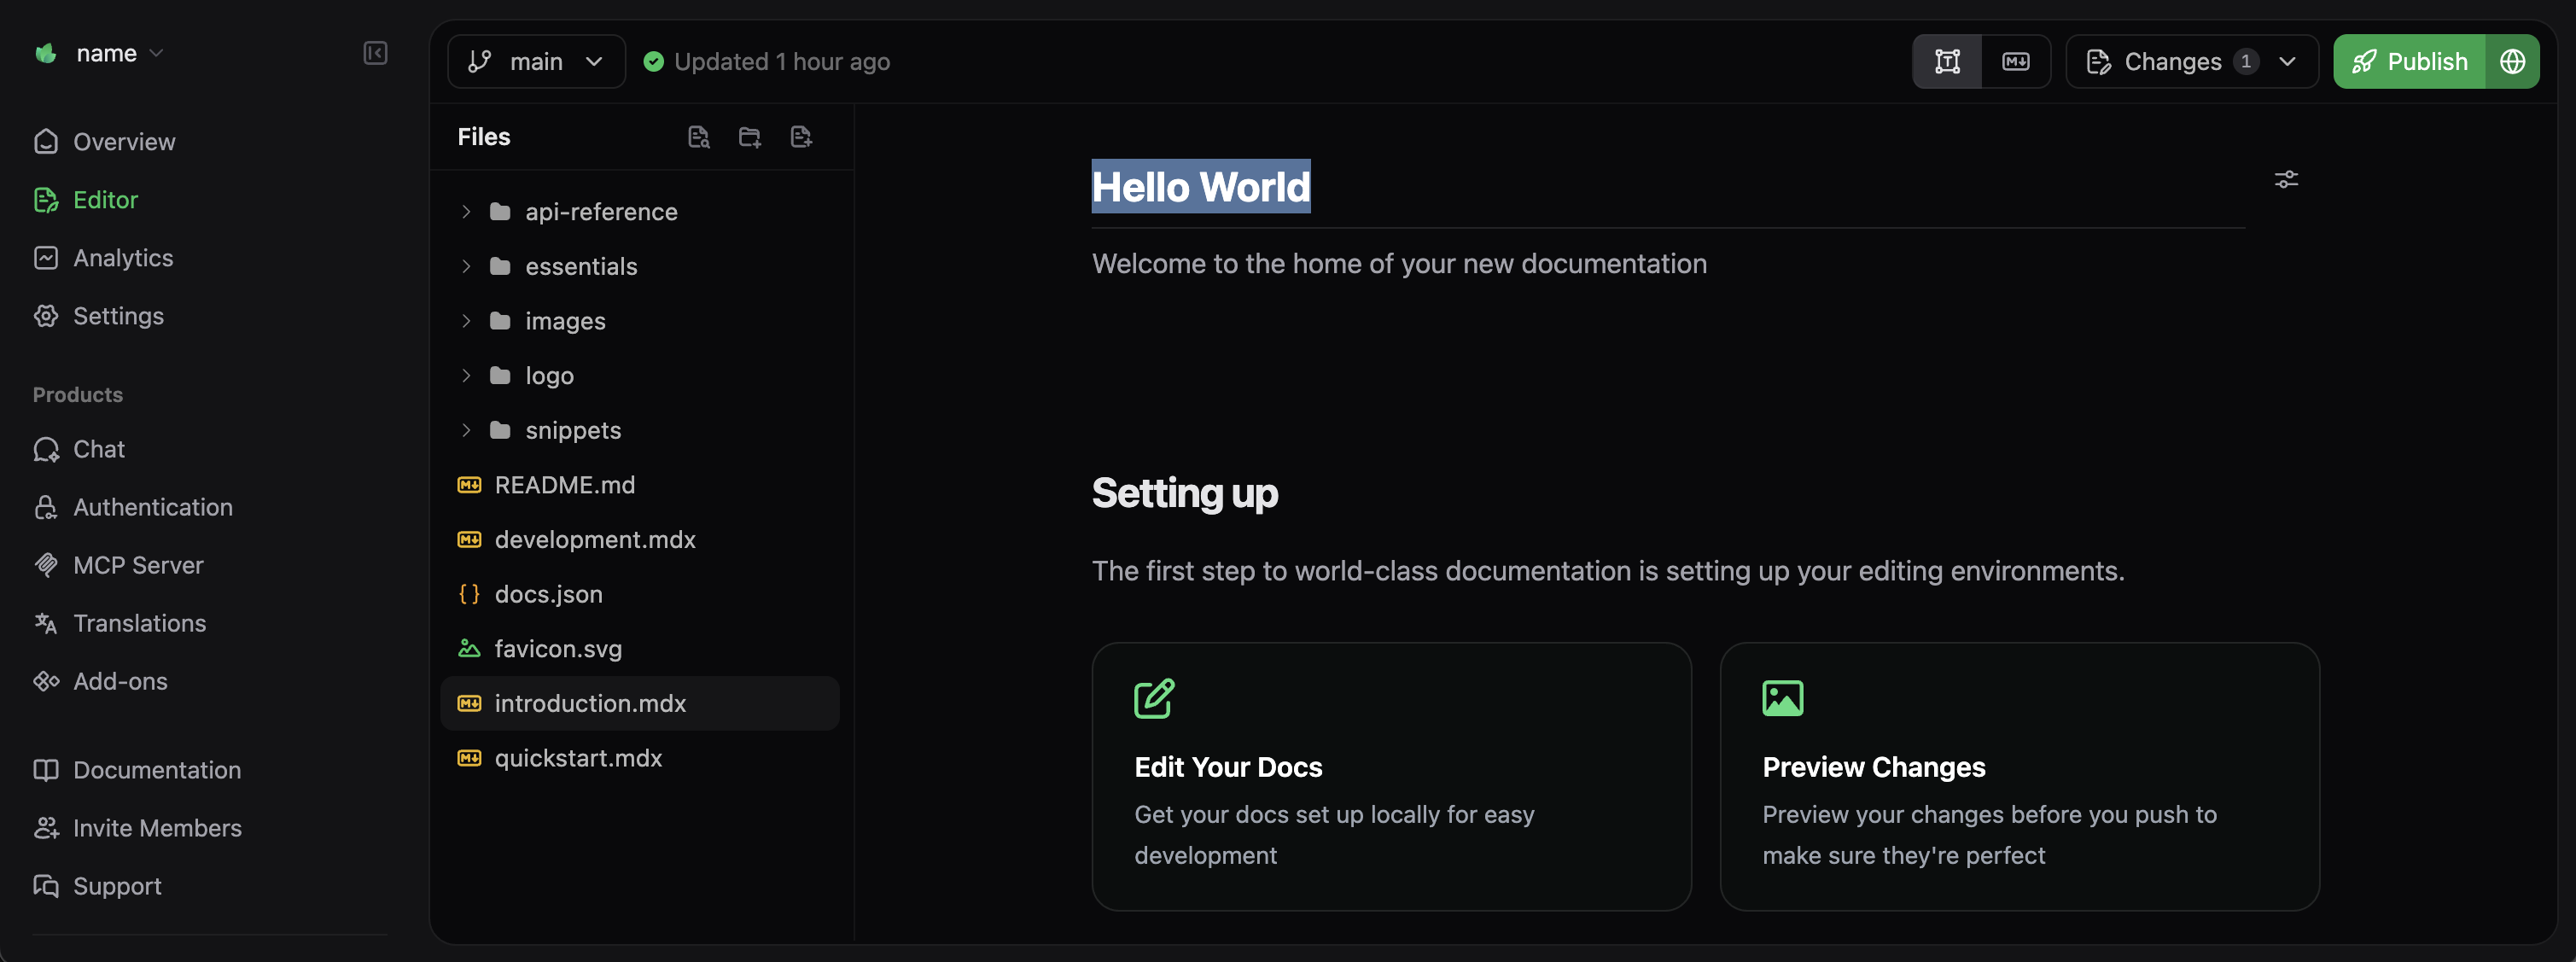
在 Web 编辑器中，你可以通过侧边栏浏览文档文件。现在更新介绍页：

在文件资源管理器中找到并选择 `index.mdx`。

然后在编辑器中，将 title 字段更新为 “Hello World”。

<Frame>
  <img alt="在 Web 编辑器中编辑" src="https://mintcdn.com/omer-914cc1c6/zyJsbuZtXQKHf9Ui/images/quickstart/web-editor-editing-light.png?fit=max&auto=format&n=zyJsbuZtXQKHf9Ui&q=85&s=dba4ac2555d65a032db1b916e675024f" className="block dark:hidden" width="3022" height="1130" data-path="images/quickstart/web-editor-editing-light.png" />

  <img alt="在 Web 编辑器中编辑" src="https://mintcdn.com/omer-914cc1c6/zyJsbuZtXQKHf9Ui/images/quickstart/web-editor-editing-dark.png?fit=max&auto=format&n=zyJsbuZtXQKHf9Ui&q=85&s=884188155cb4f084979fc0d15883dec8" className="hidden dark:block" width="3018" height="1127" data-path="images/quickstart/web-editor-editing-dark.png" />
</Frame>

<Tip>
  编辑器提供了丰富的格式工具和组件。在编辑器中按下 <kbd>/</kbd> 打开命令菜单以使用这些工具。
</Tip>

<div id="publish-your-changes">
  ### 发布更改
</div>

当你对编辑结果满意时，点击右上角的 **Publish** 按钮。你的更改会立即部署到文档站点。

<Tip>
  使用 branch，并通过拉取请求（PR；亦称“合并请求”/Merge Request）在部署到线上站点前进行预览和评审。
</Tip>

关于使用网页版编辑器的更多详情（包括如何使用 branch 和拉取请求进行协作与预览更改），请参阅我们的[网页版编辑器文档](/zh/editor/getting-started)。

<div id="adding-a-custom-domain">
  ## 添加自定义域名
</div>

虽然 `<your-project-name>.mintlify.app` 子域适合用于测试和开发，但大多数团队更倾向在生产环境的文档中使用自定义域名。

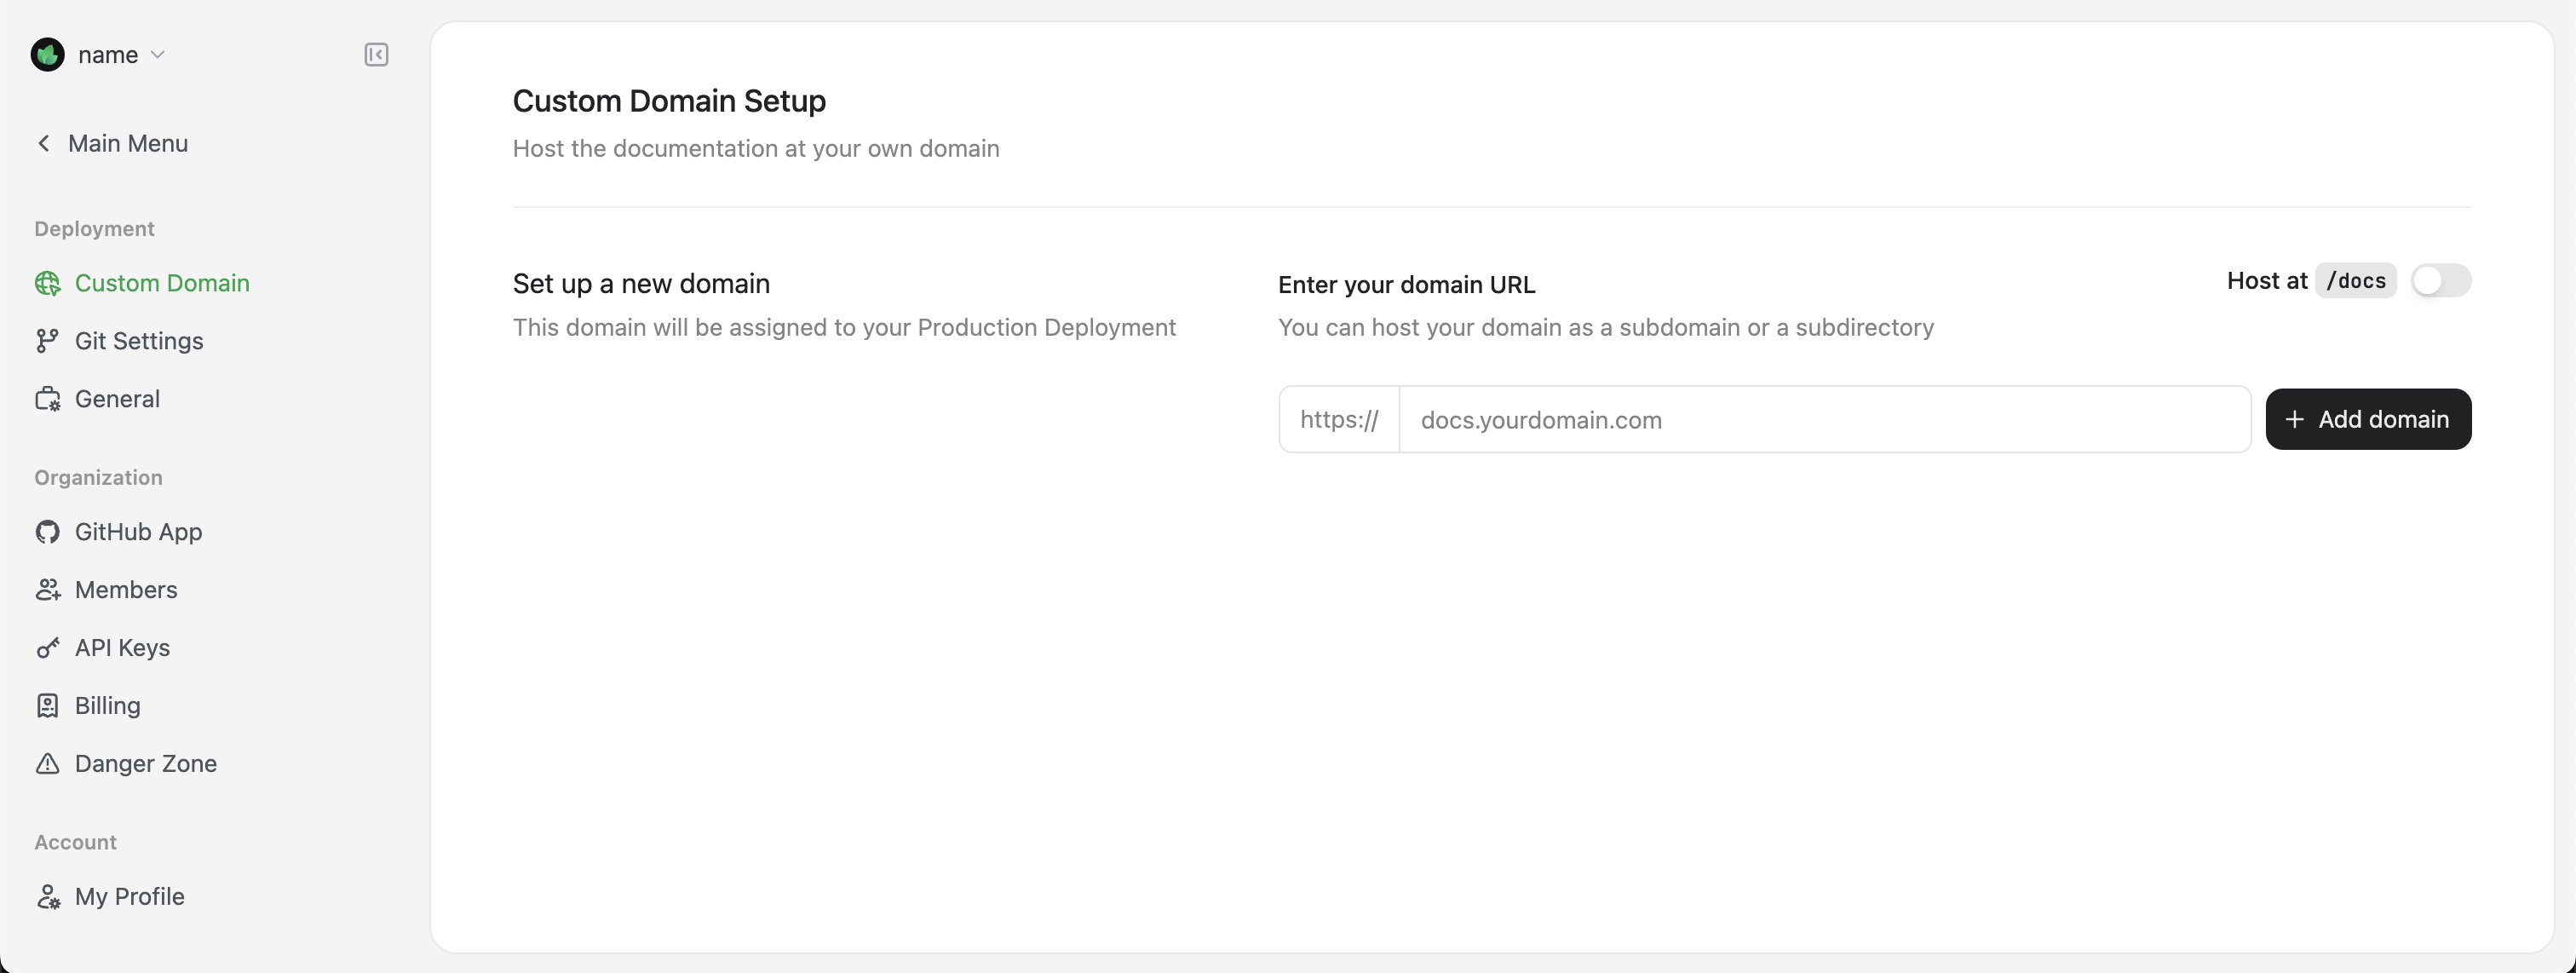
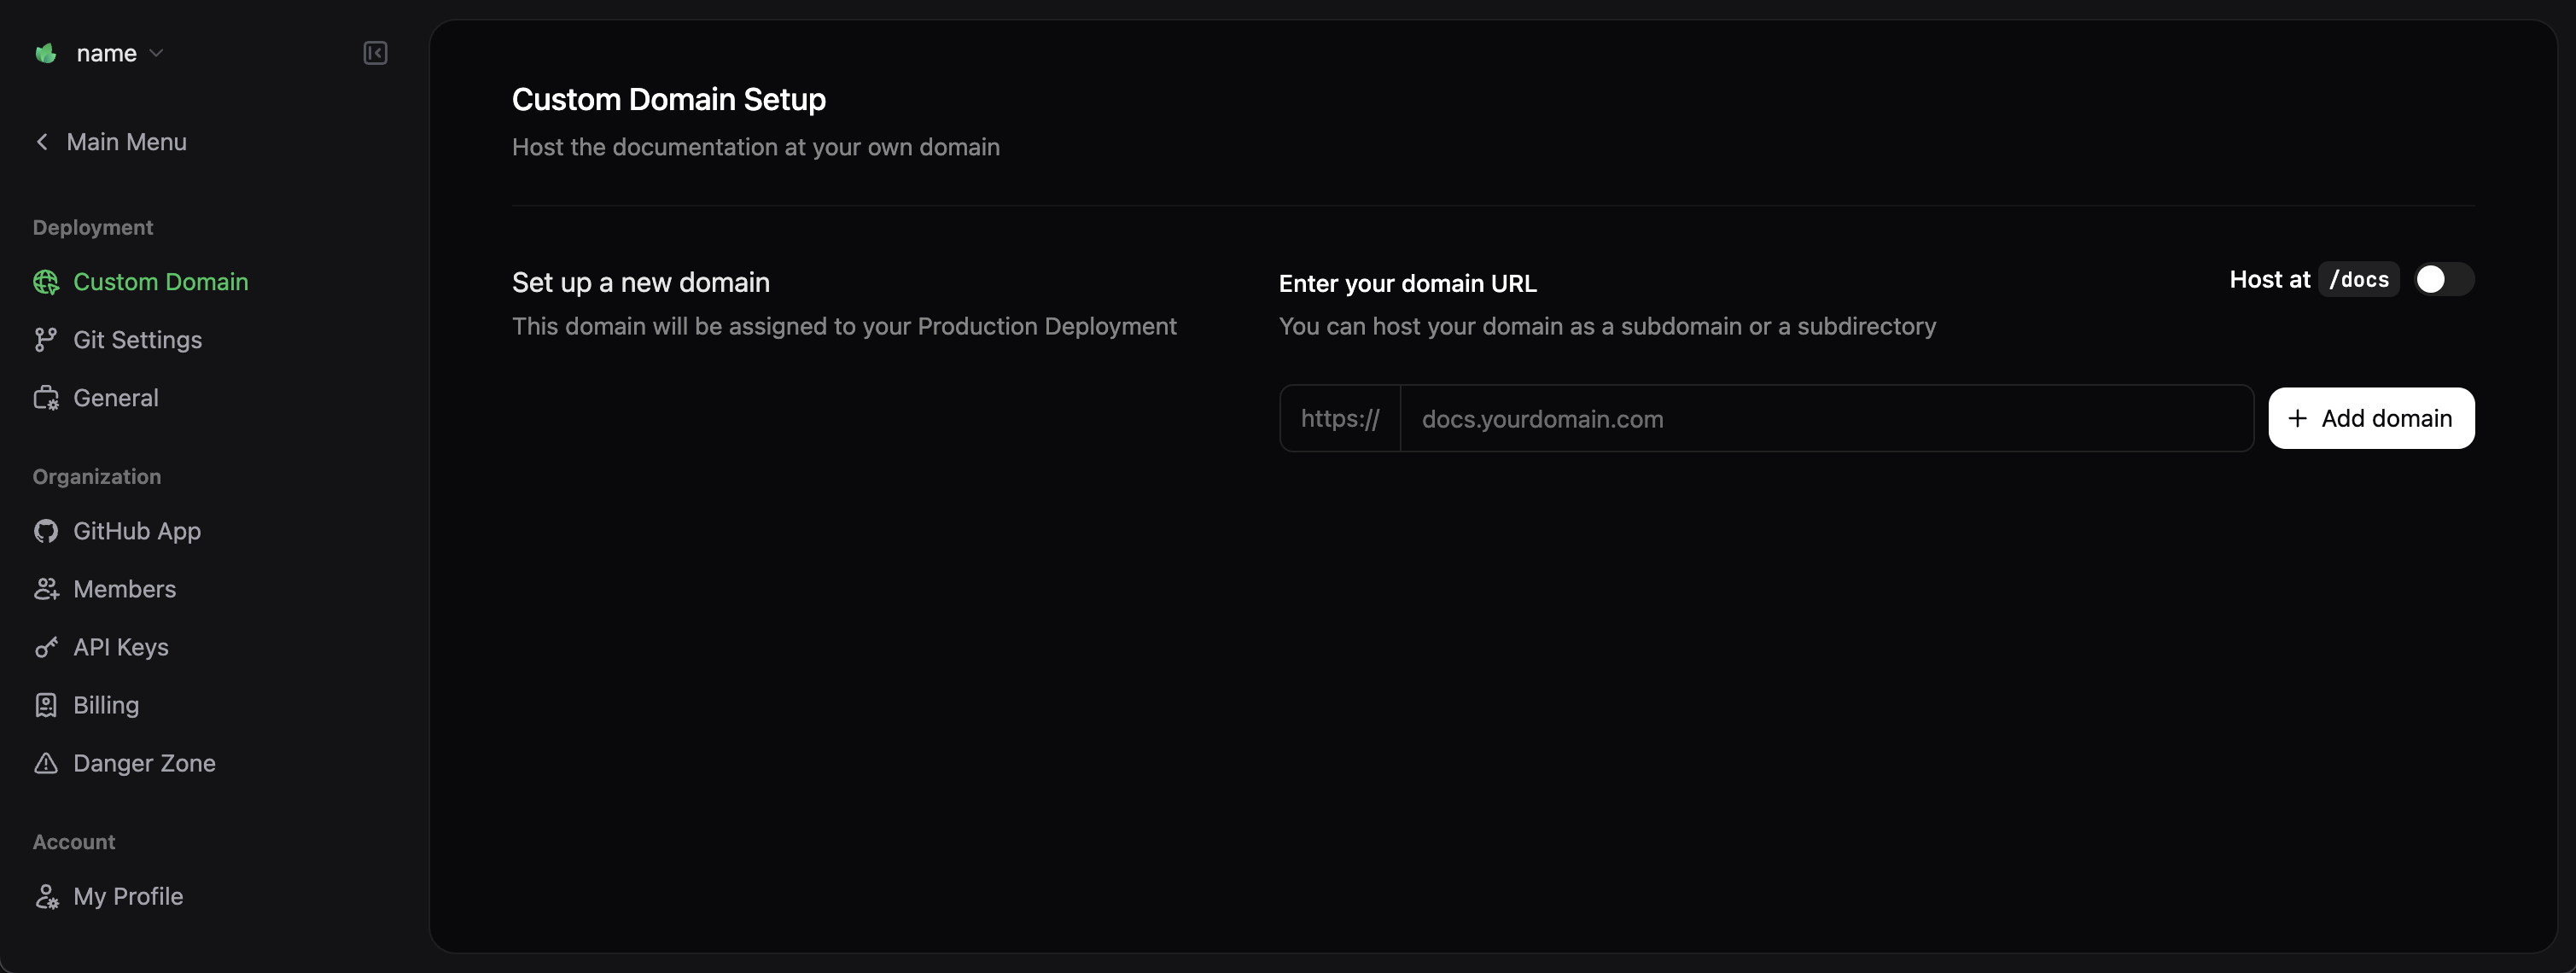
要添加自定义域名，请前往控制台的 [Domain Setup](https://dashboard.mintlify.com/settings/deployment/custom-domain) 页面。

<Frame>
  <img src="https://mintcdn.com/omer-914cc1c6/zyJsbuZtXQKHf9Ui/images/quickstart/custom-domain-light.png?fit=max&auto=format&n=zyJsbuZtXQKHf9Ui&q=85&s=4bc19cade3f8be7eab420caa02b00e3d" alt="Custom Domain" className="block dark:hidden" width="3024" height="1142" data-path="images/quickstart/custom-domain-light.png" />

  <img src="https://mintcdn.com/omer-914cc1c6/zyJsbuZtXQKHf9Ui/images/quickstart/custom-domain-dark.png?fit=max&auto=format&n=zyJsbuZtXQKHf9Ui&q=85&s=9d0b45698899a93e85c9888571bd25b7" alt="Custom Domain" className="hidden dark:block" width="3018" height="1140" data-path="images/quickstart/custom-domain-dark.png" />
</Frame>

输入你的 domain（例如 `docs.yourcompany.com`），并按照页面上的指引在域名服务商处配置 DNS（域名系统）设置。

<Table>
  | 记录类型  | 名称        | 值                  | TTL  |
  | ----- | --------- | ------------------ | ---- |
  | CNAME | docs（或子域） | cname.mintlify.app | 3600 |
</Table>

<Info>
  DNS 变更的全网生效可能需要最长 48 小时，但通常会更快完成。
</Info>

<div id="next-steps">
  ## 后续步骤
</div>

恭喜！您已成功使用 Mintlify 部署文档站点。以下是提升文档的推荐后续步骤：

<Card title="配置全局设置" icon="settings" href="zh/settings" horizontal>
  使用 `docs.json` 文件配置全站样式、导航、integrations 等更多设置。
</Card>

<Card title="自定义主题" icon="paintbrush" href="zh/themes" horizontal>
  了解如何自定义颜色、字体，以及文档站点的整体外观。
</Card>

<Card title="组织导航" icon="map" href="zh/navigation" horizontal>
  通过清晰直观的导航来组织文档，帮助用户快速找到所需内容。
</Card>

<Card title="添加交互组件" icon="puzzle" href="/zh/components/accordions" horizontal>
  使用折叠面板、选项卡和代码示例等交互组件增强文档。
</Card>

<Card title="设置 API 参考" icon="code" href="/zh/api-playground/overview" horizontal>
  基于 OpenAPI 和 AsyncAPI 规范创建交互式 API 参考。
</Card>

<div id="troubleshooting">
  ## 疑难解答
</div>

如果在设置过程中遇到问题，请查看以下常见解决方案：

<AccordionGroup>
  <Accordion title="本地预览无法运行">
    请确保已安装 Node.js v19+，并在包含 `docs.json` 文件的目录中运行 `mint dev` 命令。
  </Accordion>

  <Accordion title="更改未在在线站点生效">
    部署可能需要几分钟时间。请检查你的 GitHub Actions（用于基于代码的工作流）或在 Mintlify 控制台中的部署日志，确认没有构建错误。
  </Accordion>

  <Accordion title="自定义域名无法连接">
    请确认你的 DNS（域名系统）记录已正确配置，并留出足够的 DNS 传播时间（最长可达 48 小时）。你可以使用 [DNSChecker](https://dnschecker.org) 等工具验证你的 CNAME 记录。
  </Accordion>
</AccordionGroup>