> ## Documentation Index
> Fetch the complete documentation index at: https://omer-914cc1c6.mintlify.site/llms.txt
> Use this file to discover all available pages before exploring further.
# Playground
> Enable users to interact with your API
## Overview
The API playground is an interactive environment that lets users test and explore your API endpoints. Developers can craft API requests, submit them, and view responses without leaving your documentation.
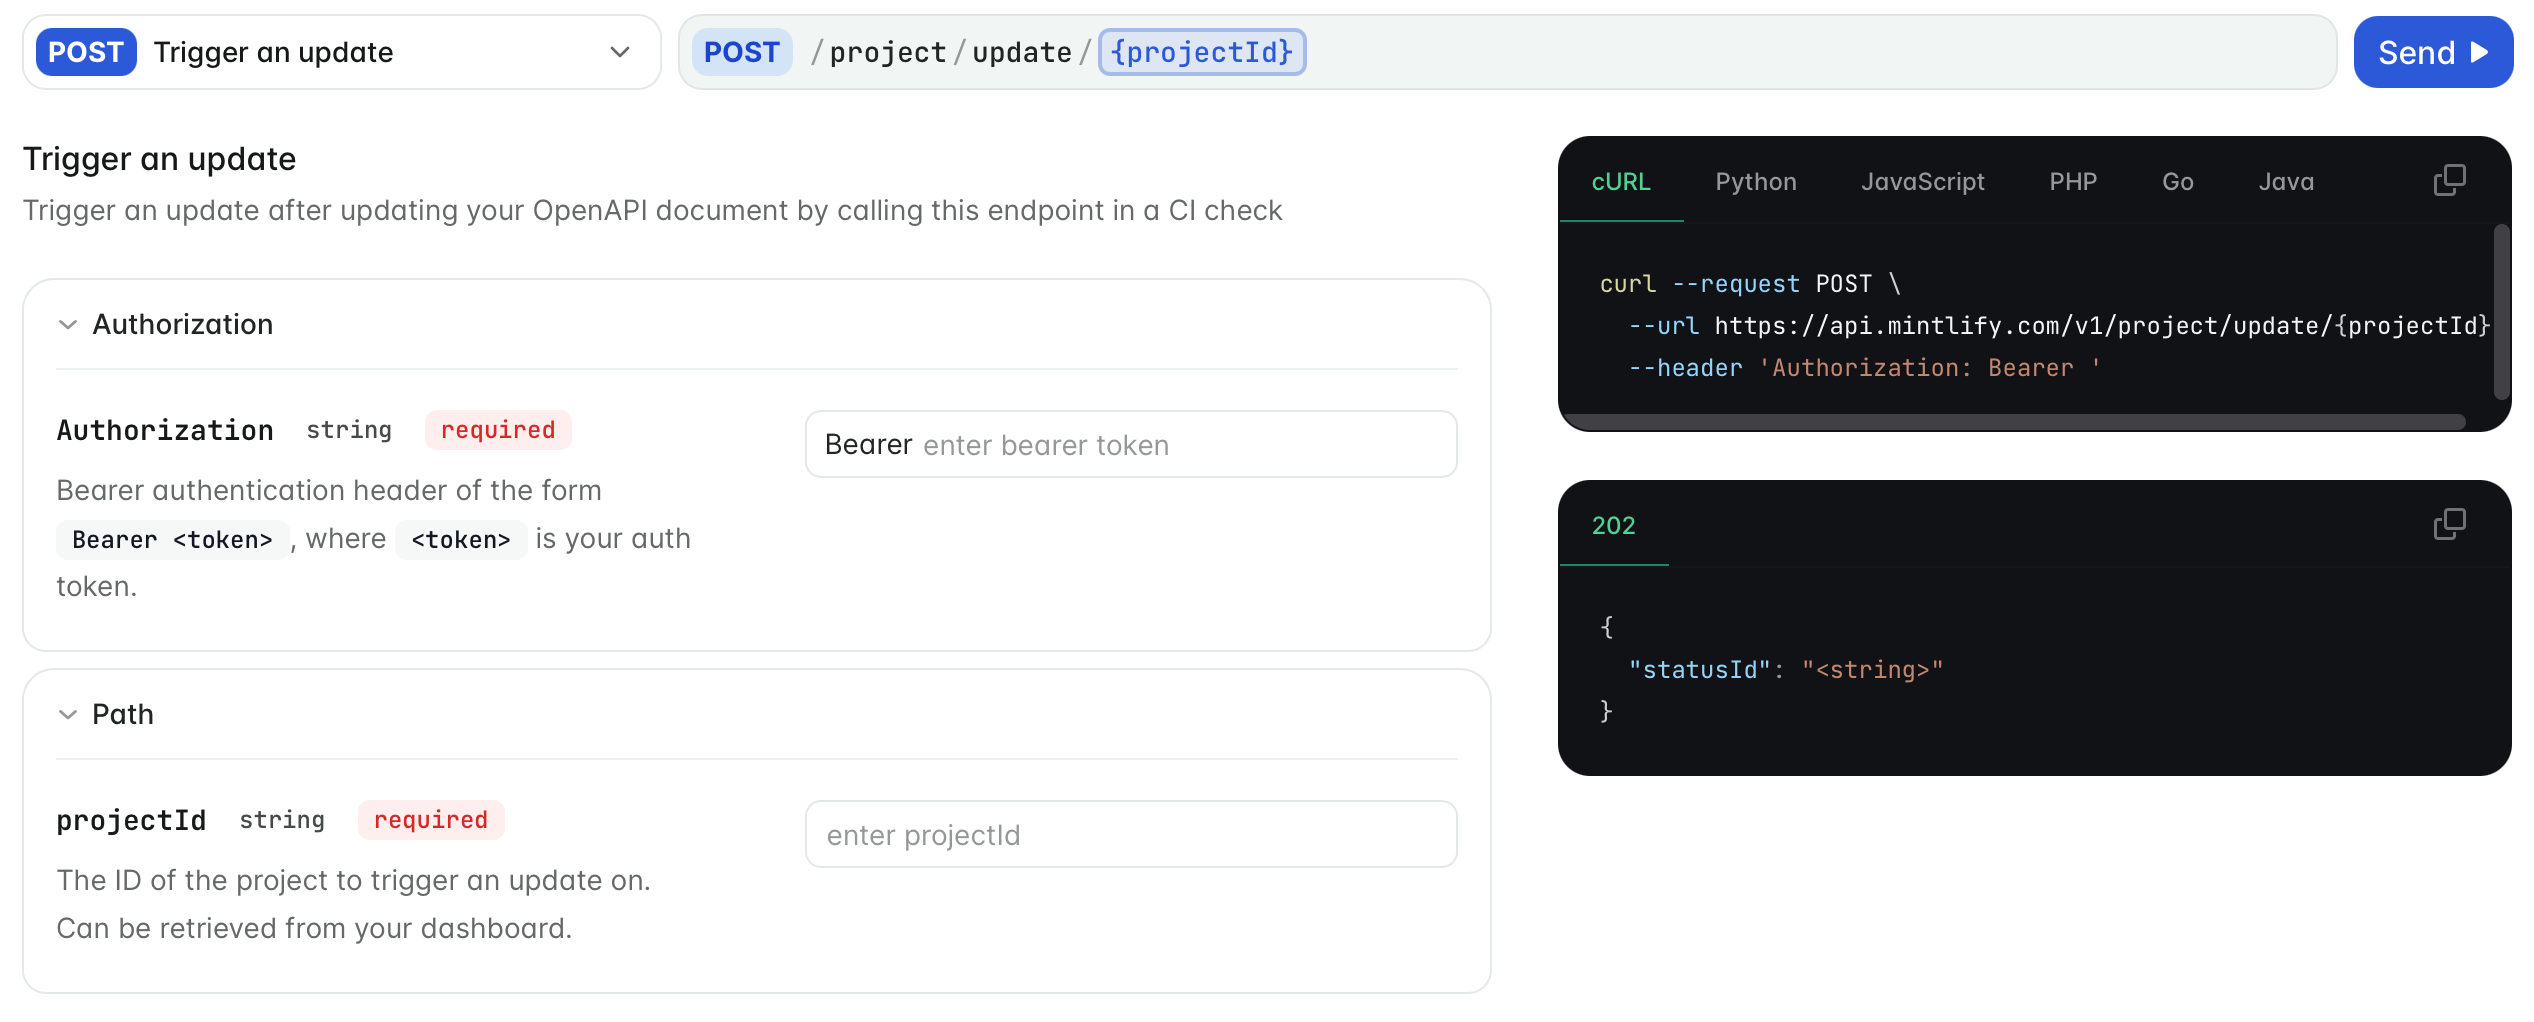
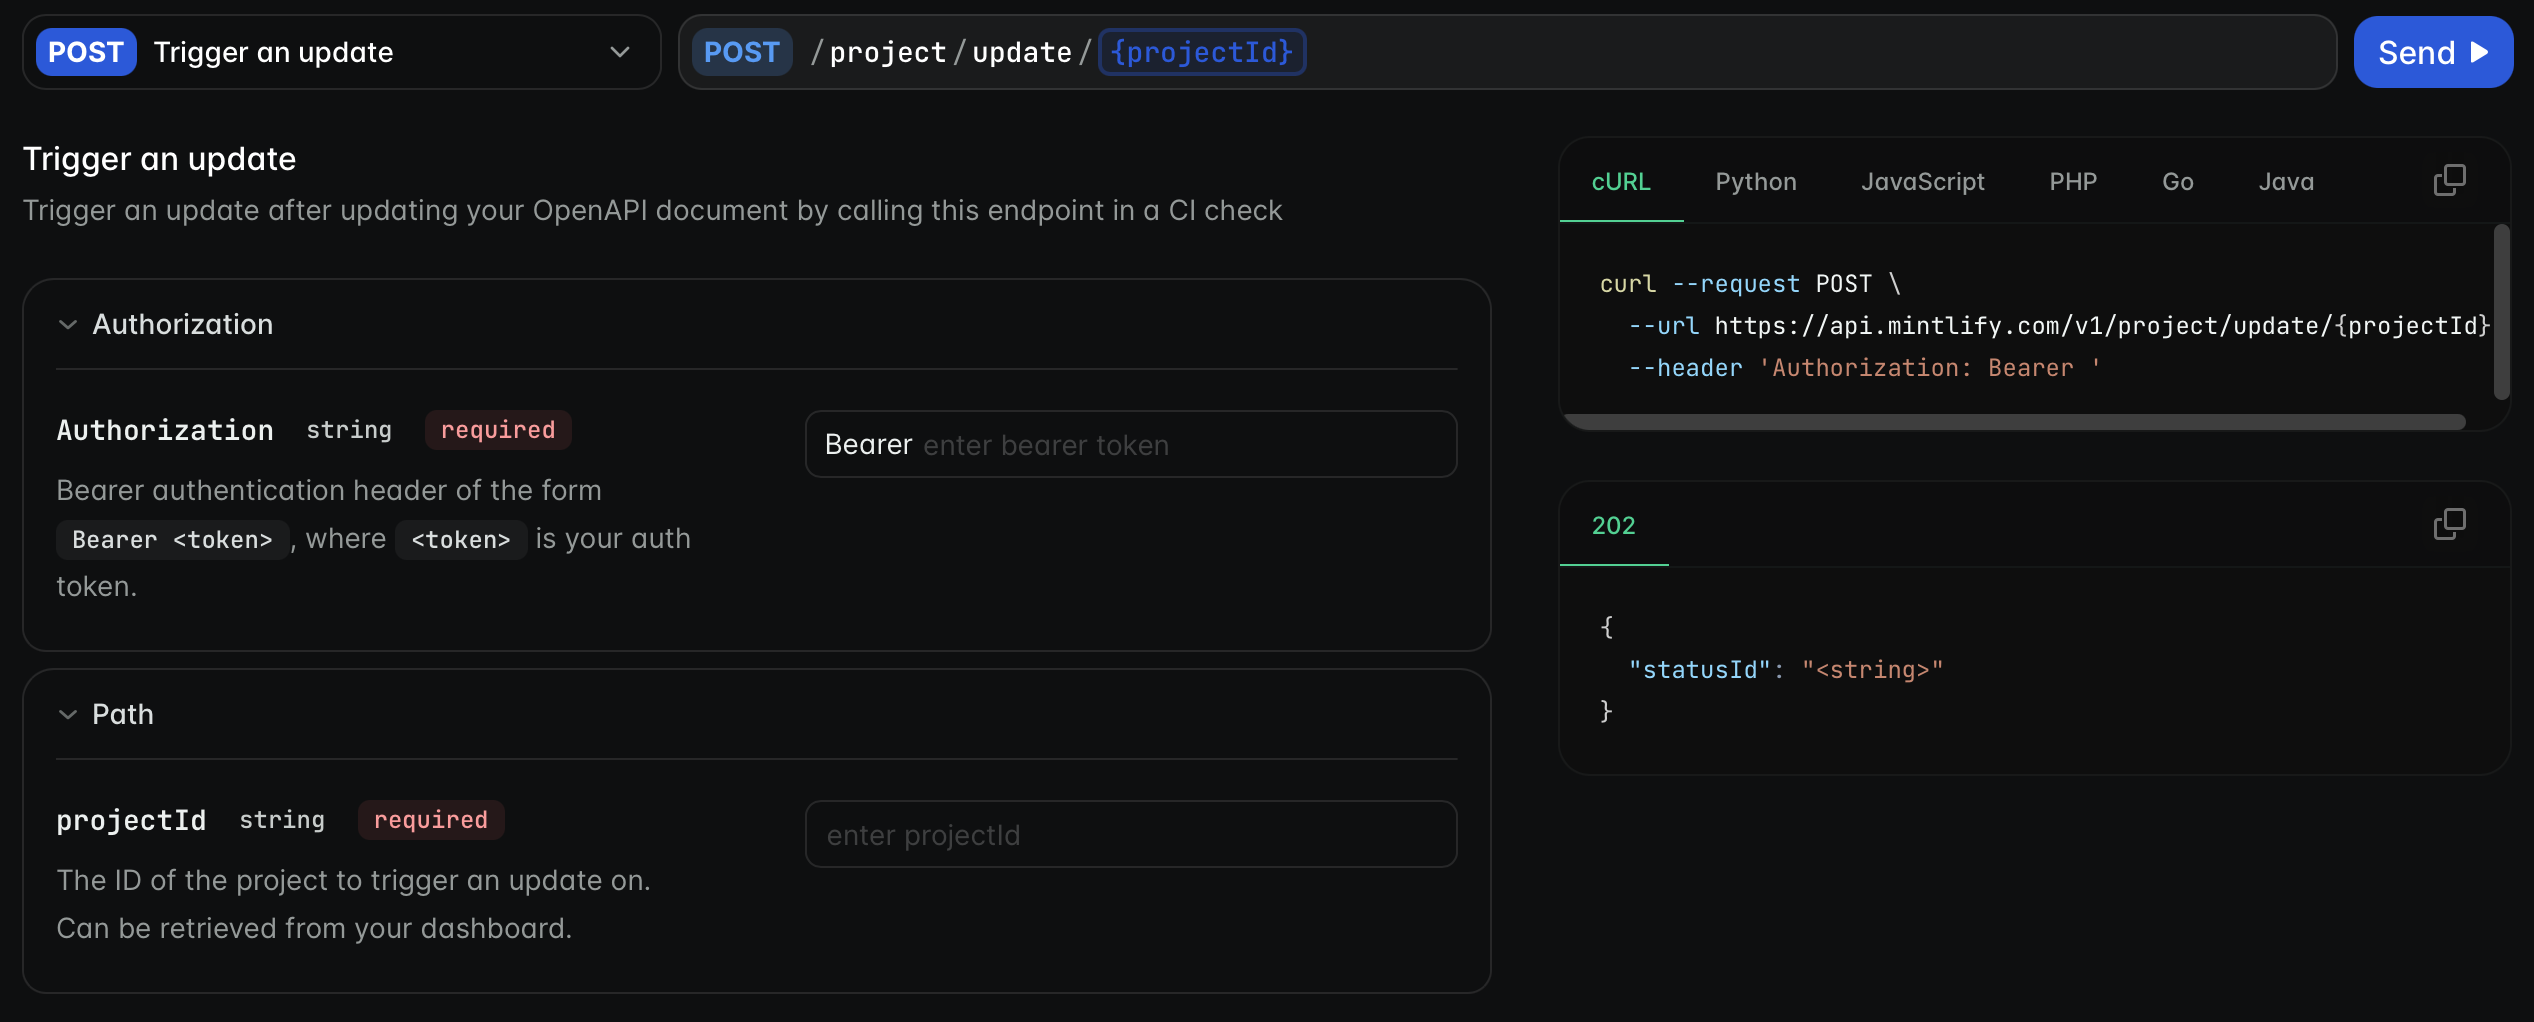 The playground is automatically generated from your OpenAPI specification or AsyncAPI schema so any updates to your API are automatically reflected in the playground. You can also manually create API reference pages after defining a base URL and authentication method in your `docs.json`.
We recommend generating your API playground from an OpenAPI specification. See [OpenAPI Setup](/api-playground/openapi-setup) for more information on creating your OpenAPI document.
## Getting started
Make sure that your OpenAPI specification file is valid using the [Swagger Editor](https://editor.swagger.io/) or [Mint CLI](https://www.npmjs.com/package/mint).
```bash {3} theme={null}
/your-project
|- docs.json
|- openapi.json
```
Update your `docs.json` to reference your OpenAPI specification. Add an `openapi` property to any navigation element to auto-populate your docs with pages for each endpoint specified in your OpenAPI document.
This example generates a page for each endpoint specified in `openapi.json` and organize them under the "API reference" group in your navigation.
```json theme={null}
"navigation": {
"groups": [
{
"group": "API reference",
"openapi": "openapi.json"
}
]
}
```
To generate pages for only specific endpoints, list the endpoints in the `pages` property of the navigation element.
This example generates pages for only the `GET /users` and `POST /users` endpoints. To genereate other endpoint pages, add additional endpoints to the `pages` array.
```json theme={null}
"navigation": {
"groups": [
{
"group": "API reference",
"openapi": "openapi.json",
"pages": [
"GET /users",
"POST /users"
]
}
]
}
```
## Customizing your playground
You can customize your API playground by defining the following properties in your `docs.json`.
Configurations for the API playground.
The display mode of the API playground.
* `"interactive"`: Display the interactive playground.
* `"simple"`: Display a copyable endpoint with no playground.
* `"none"`: Display nothing.
Defaults to `interactive`.
Whether to pass API requests through a proxy server. Defaults to `true`.
Configurations for the autogenerated API examples.
Example languages for the autogenerated API snippets.
Languages display in the order specified.
Whether to show optional parameters in API examples. Defaults to `all`.
### Example configuration
```json theme={null}
{
"api": {
"playground": {
"display": "interactive"
},
"examples": {
"languages": ["curl", "python", "javascript"],
"defaults": "required"
}
}
}
```
This example configures the API playground to be interactive with example code snippets for cURL, Python, and JavaScript. Only required parameters are shown in the code snippets.
### Custom endpoint pages
When you need more control over your API documentation, use the `x-mint` extension in your OpenAPI specification or create individual `MDX` pages for your endpoints.
Both options allow you to:
* Customize page metadata
* Add additional content like examples
* Control playground behavior per page
The `x-mint` extension is recommended so that all of your API documentation is automatically generated from your OpenAPI specification and maintained in one file.
Individual `MDX` pages are recommended for small APIs or when you want to experiment with changes on a per-page basis.
For more information, see [x-mint extension](/api-playground/openapi-setup#x-mint-extension) and [MDX Setup](/api-playground/mdx/configuration).
## Further reading
* [AsyncAPI Setup](/api-playground/asyncapi/setup) for more information on creating your AsyncAPI schema to generate WebSocket reference pages.
The playground is automatically generated from your OpenAPI specification or AsyncAPI schema so any updates to your API are automatically reflected in the playground. You can also manually create API reference pages after defining a base URL and authentication method in your `docs.json`.
We recommend generating your API playground from an OpenAPI specification. See [OpenAPI Setup](/api-playground/openapi-setup) for more information on creating your OpenAPI document.
## Getting started
Make sure that your OpenAPI specification file is valid using the [Swagger Editor](https://editor.swagger.io/) or [Mint CLI](https://www.npmjs.com/package/mint).
```bash {3} theme={null}
/your-project
|- docs.json
|- openapi.json
```
Update your `docs.json` to reference your OpenAPI specification. Add an `openapi` property to any navigation element to auto-populate your docs with pages for each endpoint specified in your OpenAPI document.
This example generates a page for each endpoint specified in `openapi.json` and organize them under the "API reference" group in your navigation.
```json theme={null}
"navigation": {
"groups": [
{
"group": "API reference",
"openapi": "openapi.json"
}
]
}
```
To generate pages for only specific endpoints, list the endpoints in the `pages` property of the navigation element.
This example generates pages for only the `GET /users` and `POST /users` endpoints. To genereate other endpoint pages, add additional endpoints to the `pages` array.
```json theme={null}
"navigation": {
"groups": [
{
"group": "API reference",
"openapi": "openapi.json",
"pages": [
"GET /users",
"POST /users"
]
}
]
}
```
## Customizing your playground
You can customize your API playground by defining the following properties in your `docs.json`.
Configurations for the API playground.
The display mode of the API playground.
* `"interactive"`: Display the interactive playground.
* `"simple"`: Display a copyable endpoint with no playground.
* `"none"`: Display nothing.
Defaults to `interactive`.
Whether to pass API requests through a proxy server. Defaults to `true`.
Configurations for the autogenerated API examples.
Example languages for the autogenerated API snippets.
Languages display in the order specified.
Whether to show optional parameters in API examples. Defaults to `all`.
### Example configuration
```json theme={null}
{
"api": {
"playground": {
"display": "interactive"
},
"examples": {
"languages": ["curl", "python", "javascript"],
"defaults": "required"
}
}
}
```
This example configures the API playground to be interactive with example code snippets for cURL, Python, and JavaScript. Only required parameters are shown in the code snippets.
### Custom endpoint pages
When you need more control over your API documentation, use the `x-mint` extension in your OpenAPI specification or create individual `MDX` pages for your endpoints.
Both options allow you to:
* Customize page metadata
* Add additional content like examples
* Control playground behavior per page
The `x-mint` extension is recommended so that all of your API documentation is automatically generated from your OpenAPI specification and maintained in one file.
Individual `MDX` pages are recommended for small APIs or when you want to experiment with changes on a per-page basis.
For more information, see [x-mint extension](/api-playground/openapi-setup#x-mint-extension) and [MDX Setup](/api-playground/mdx/configuration).
## Further reading
* [AsyncAPI Setup](/api-playground/asyncapi/setup) for more information on creating your AsyncAPI schema to generate WebSocket reference pages.